Supabase
Open source PostgreSQL development platform
Overview
Supabase is an open source alternative to Firebase that provides a complete backend solution with PostgreSQL at its core. This guide will walk you through connecting your Hypermode agent to Supabase, enabling powerful database operations and real-time interactions.Prerequisites
Before connecting Supabase to Hypermode, you’ll need:- A Supabase account
- A Supabase project with API credentials
- A Hypermode workspace
Setting up Supabase
Step 1: Create your Supabase account
If you haven’t already, sign up for a free Supabase account.
Step 2: Generate API credentials
Navigate to your project settings and create a new API key:- Go to Settings → API in your Supabase dashboard
- Create a new service role key (this bypasses Row Level Security)
- Copy your project URL to extract the subdomain ID
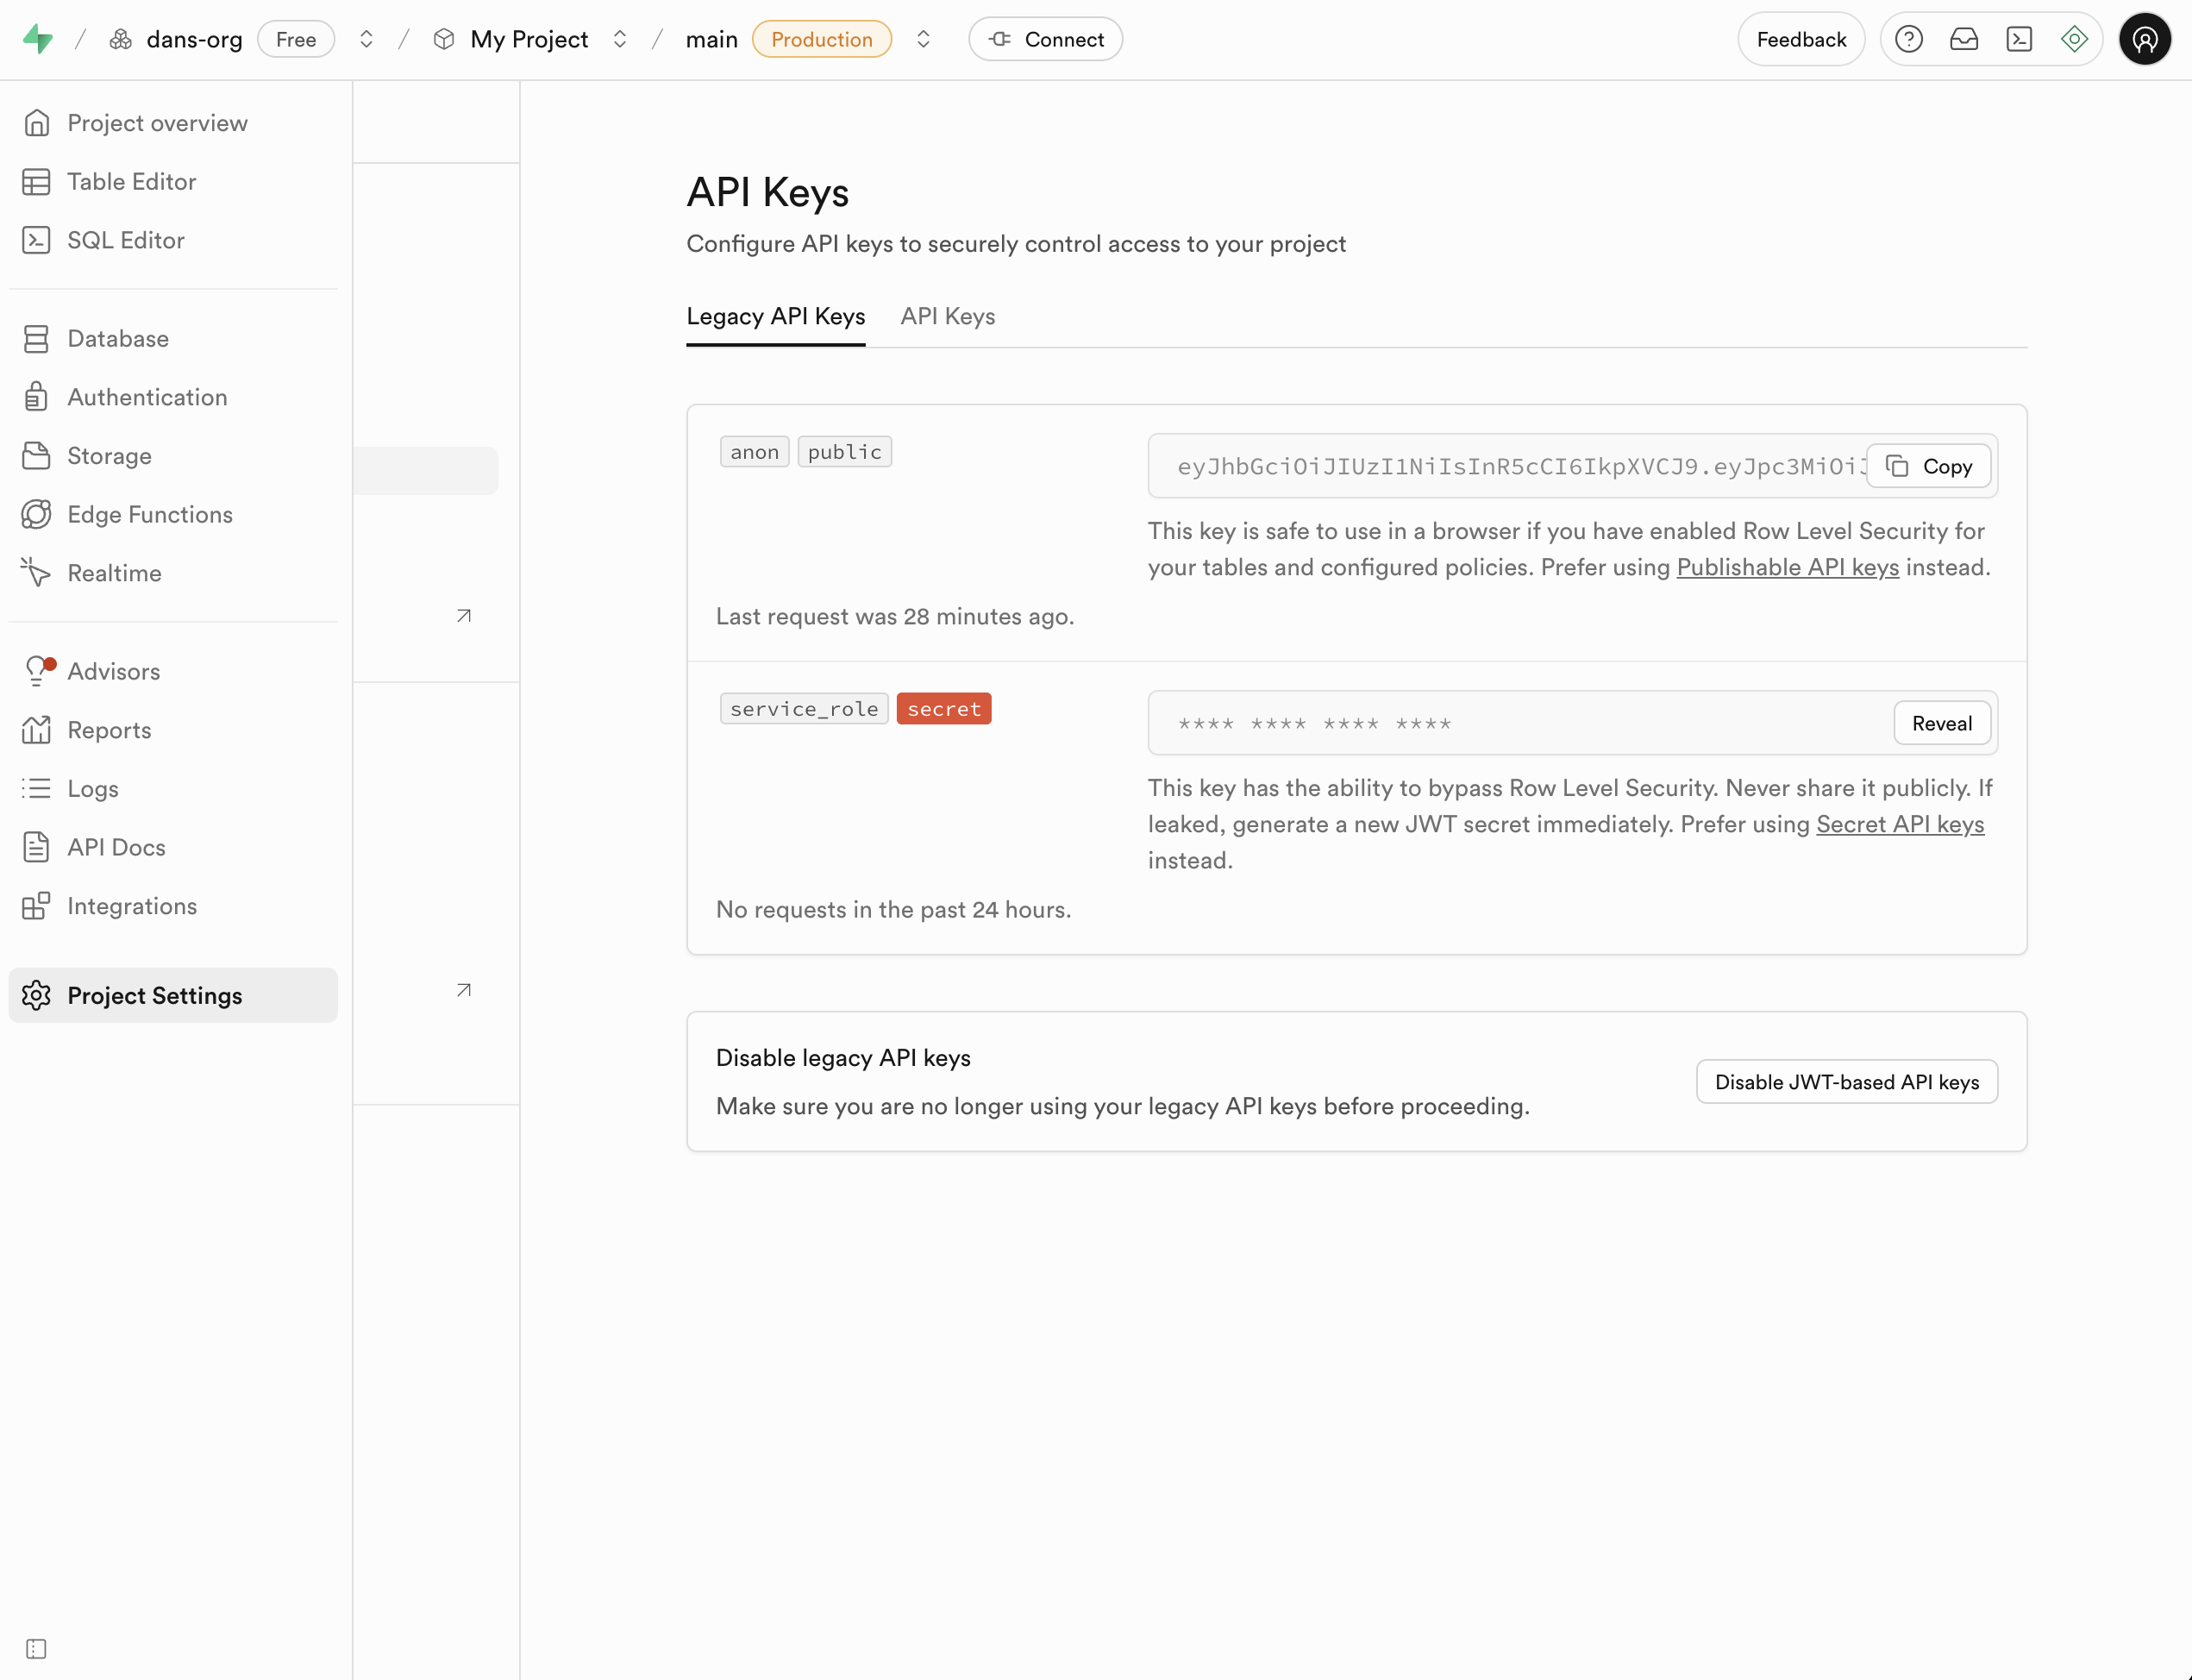
The subdomain ID is the part before
.supabase.co in the project URL. For
example, if the URL is https://supa-project-id.supabase.co, then the
subdomain ID is supa-project-id.Creating your Supabase agent
Step 1: Create a new agent
From the Hypermode interface, create a new agent manually:- Click the agent dropdown menu
- Select “Create new Agent”

Step 2: Configure agent settings
Use these recommended settings for your Supabase agent:- Agent Name: SupaAgent
- Agent Title: Connects to Supabase
- Description: SupaAgent issues queries
- Instructions: You have a connection to Supabase and various other developer tools to streamline data access and awareness
- Model: GPT-4.1

Step 3: View your agent profile
Once created, navigate to your agent’s settings page to see the profile: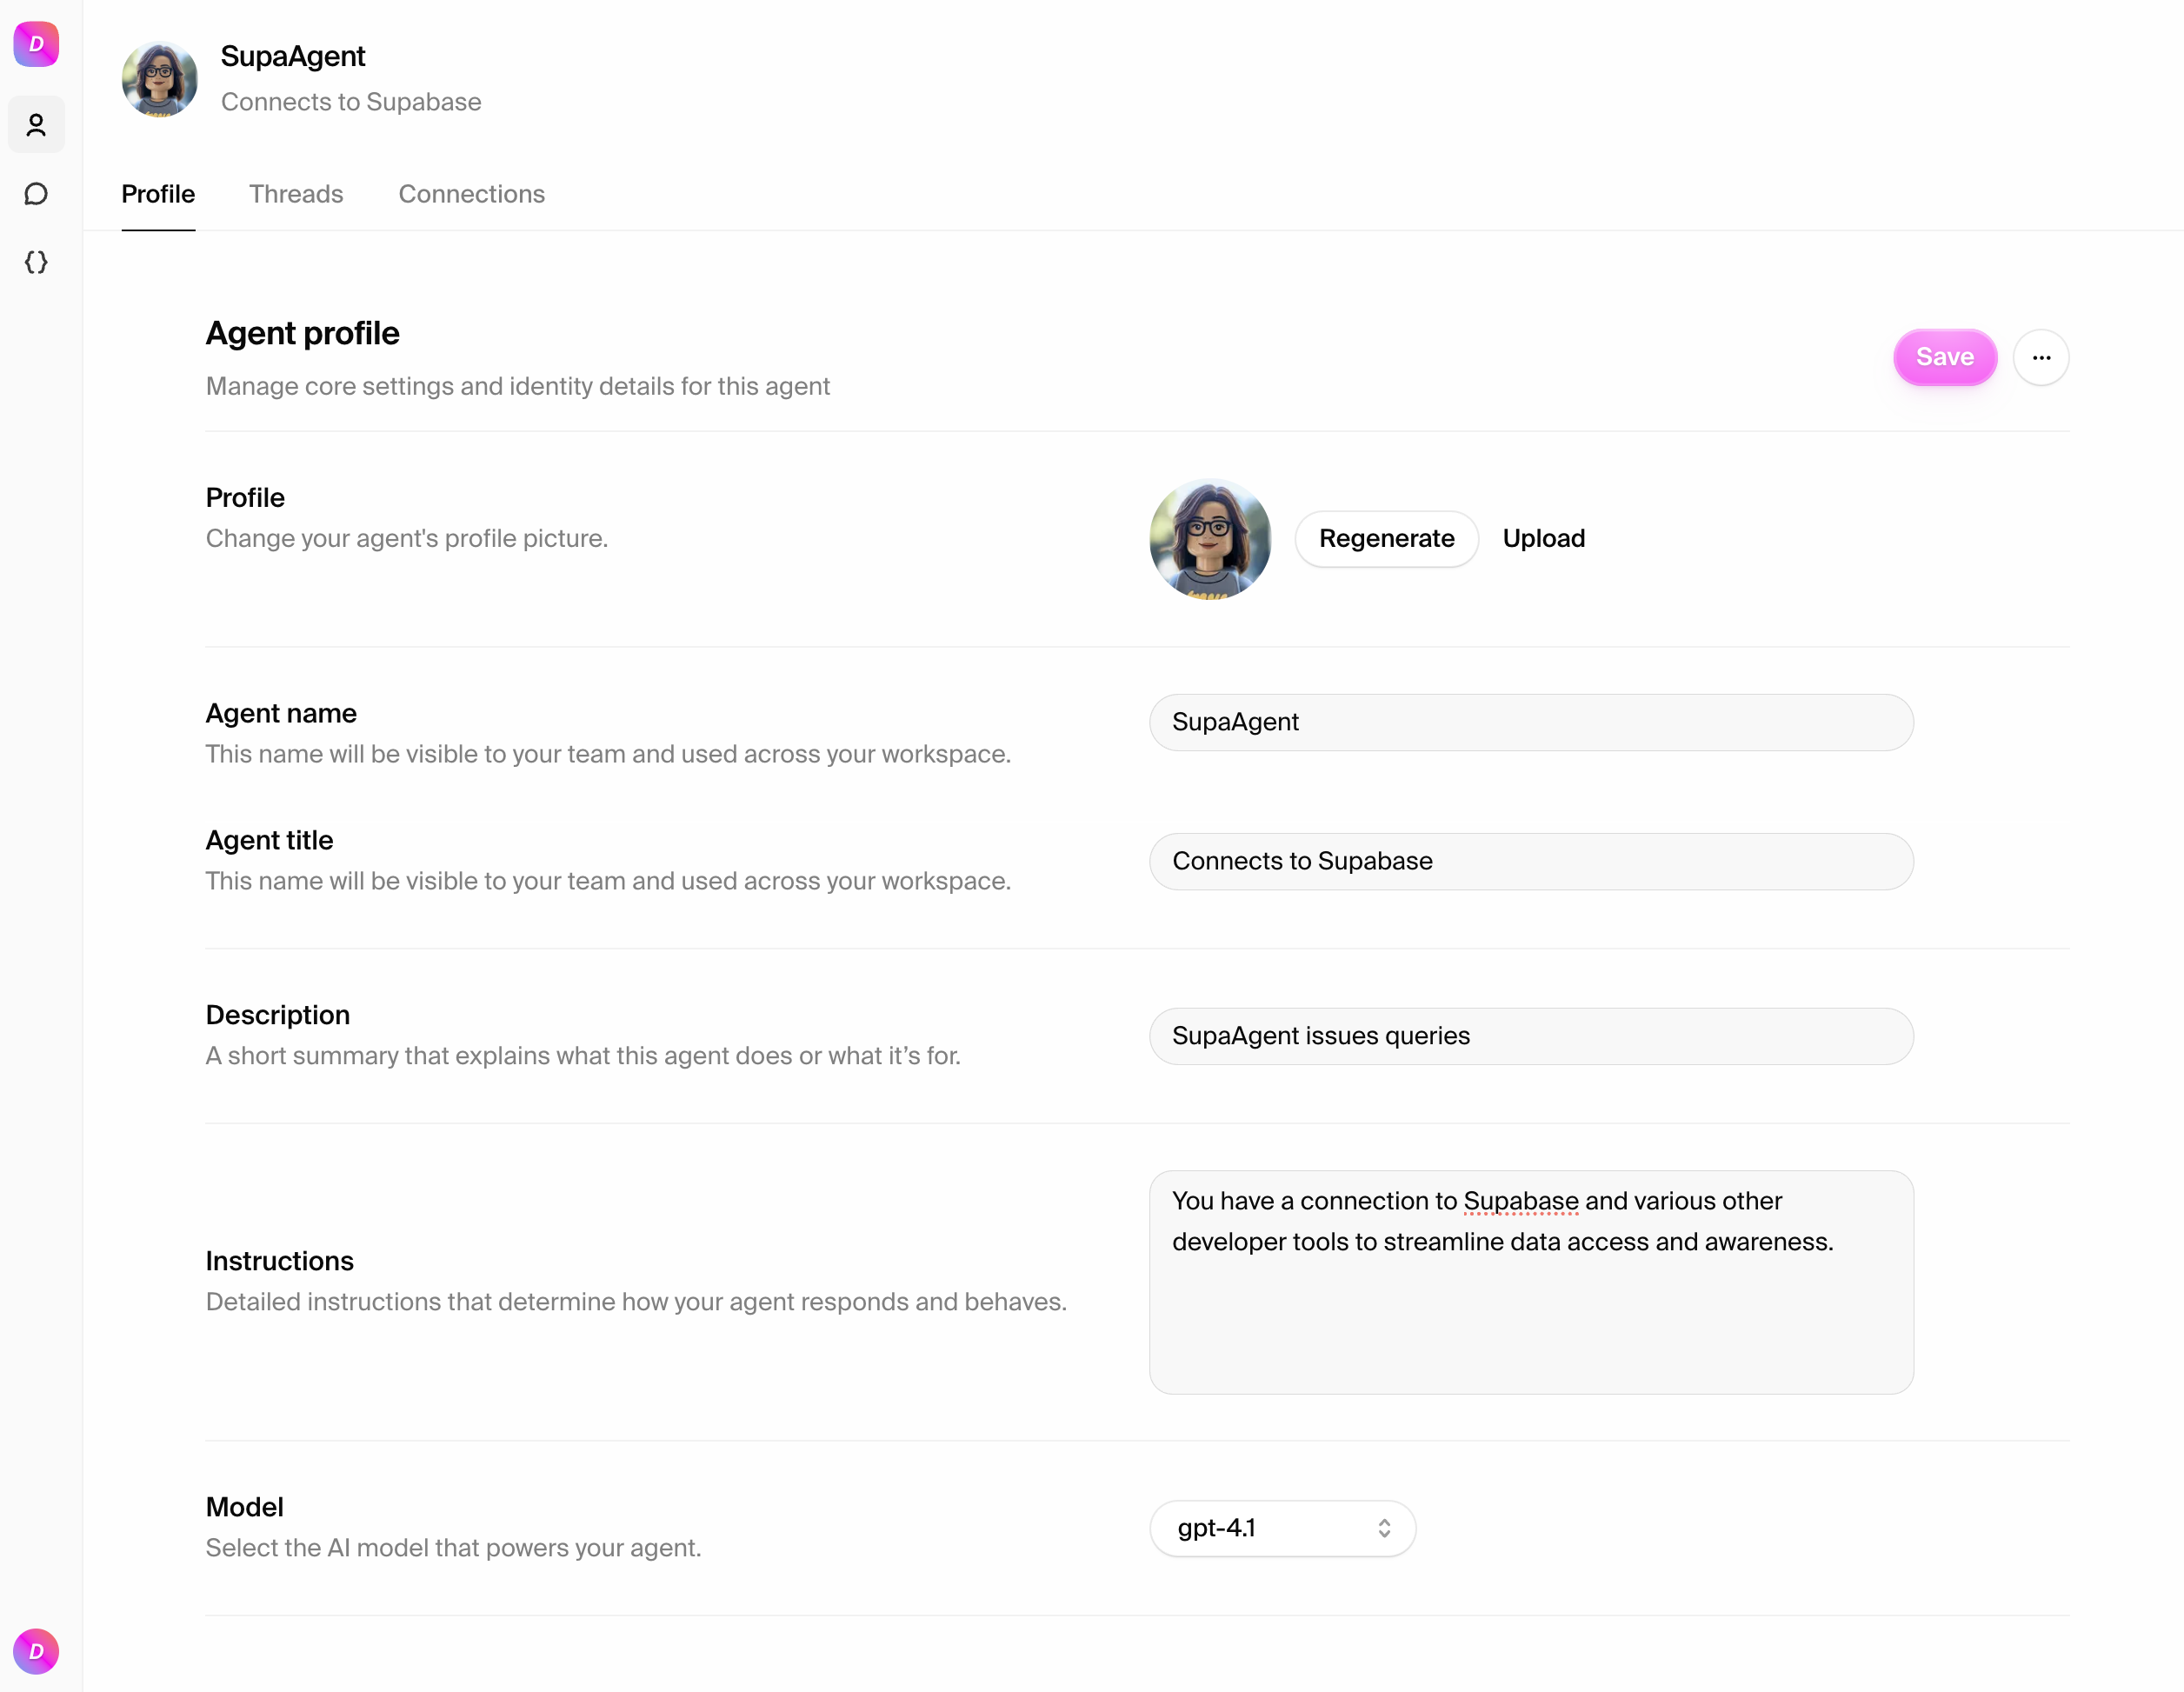
Connecting to Supabase
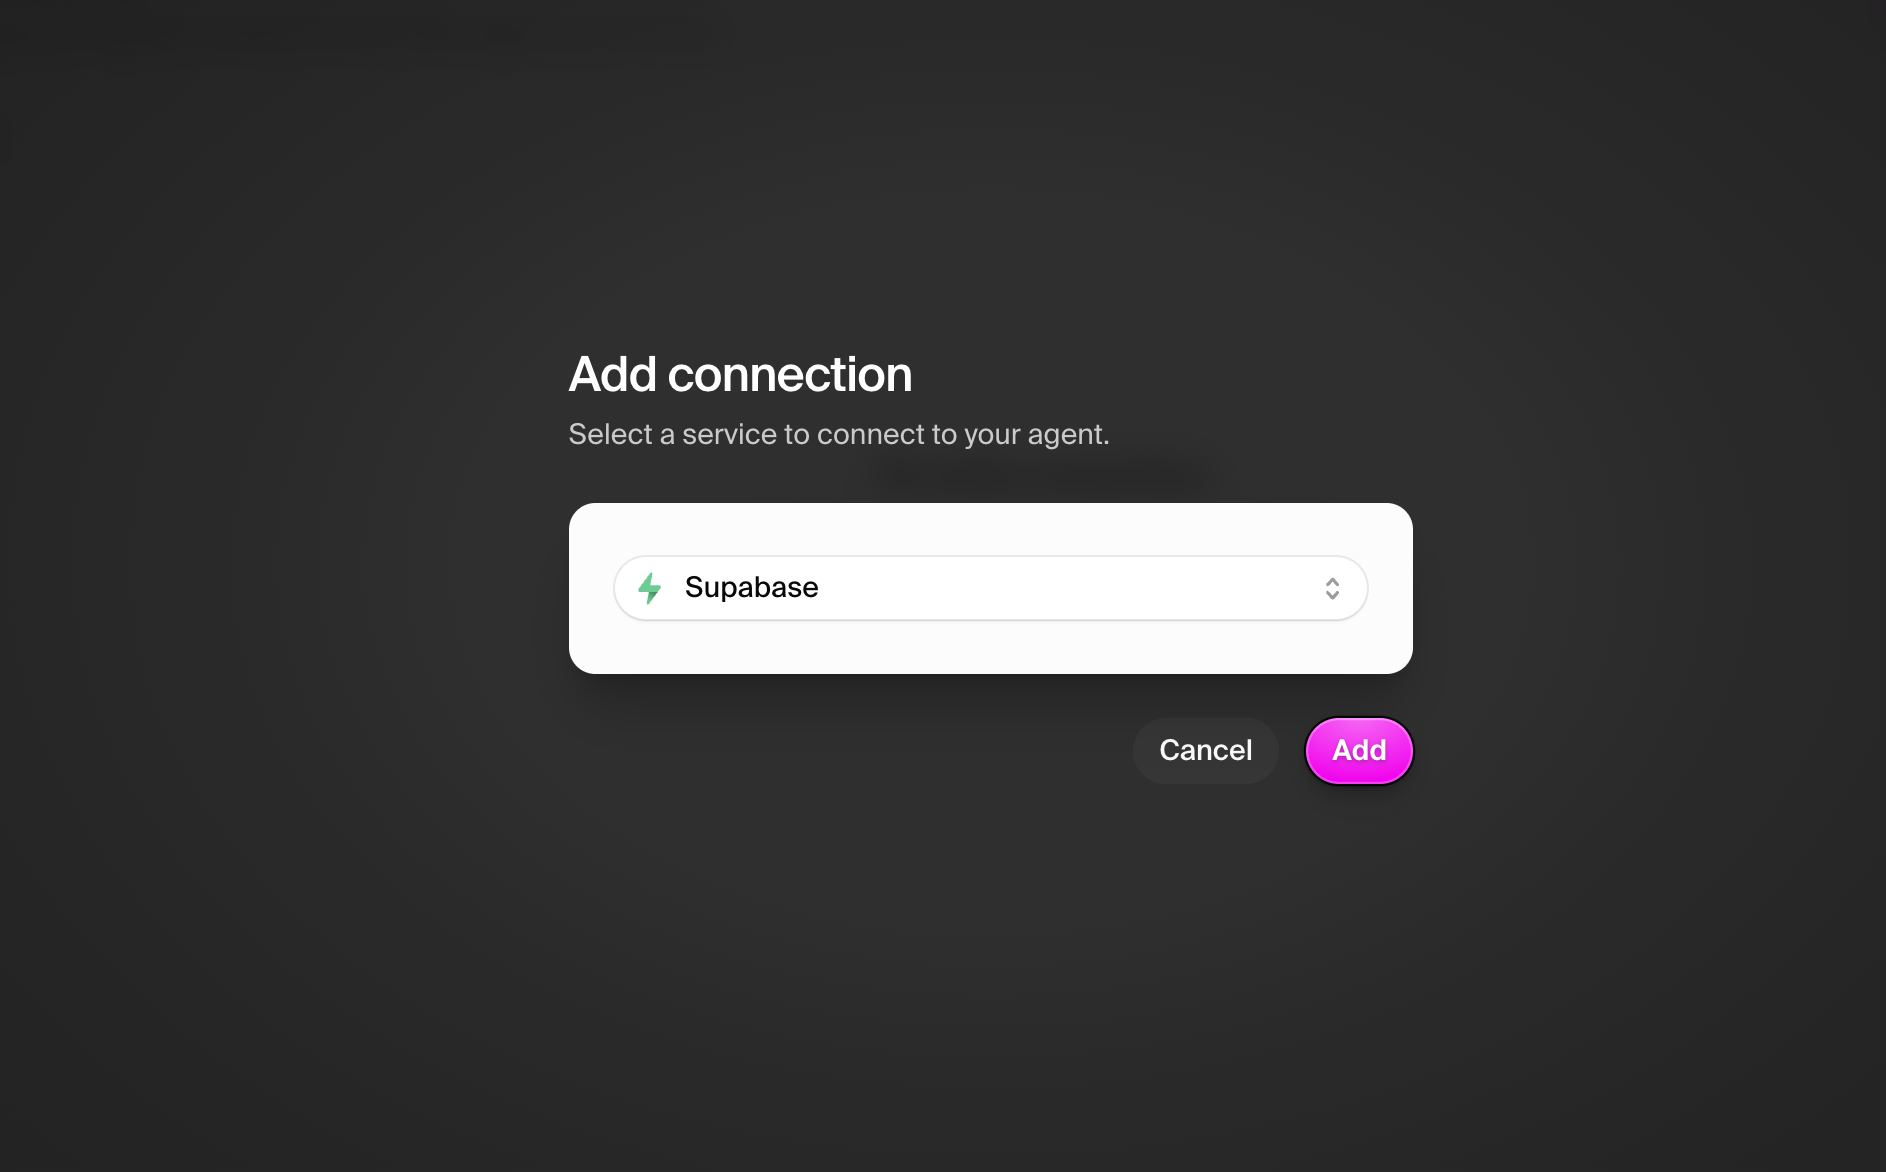
Step 1: Add the Supabase connection
Navigate to the Connections tab and add Supabase:- Click “Add connection”
- Select “Supabase” from the dropdown
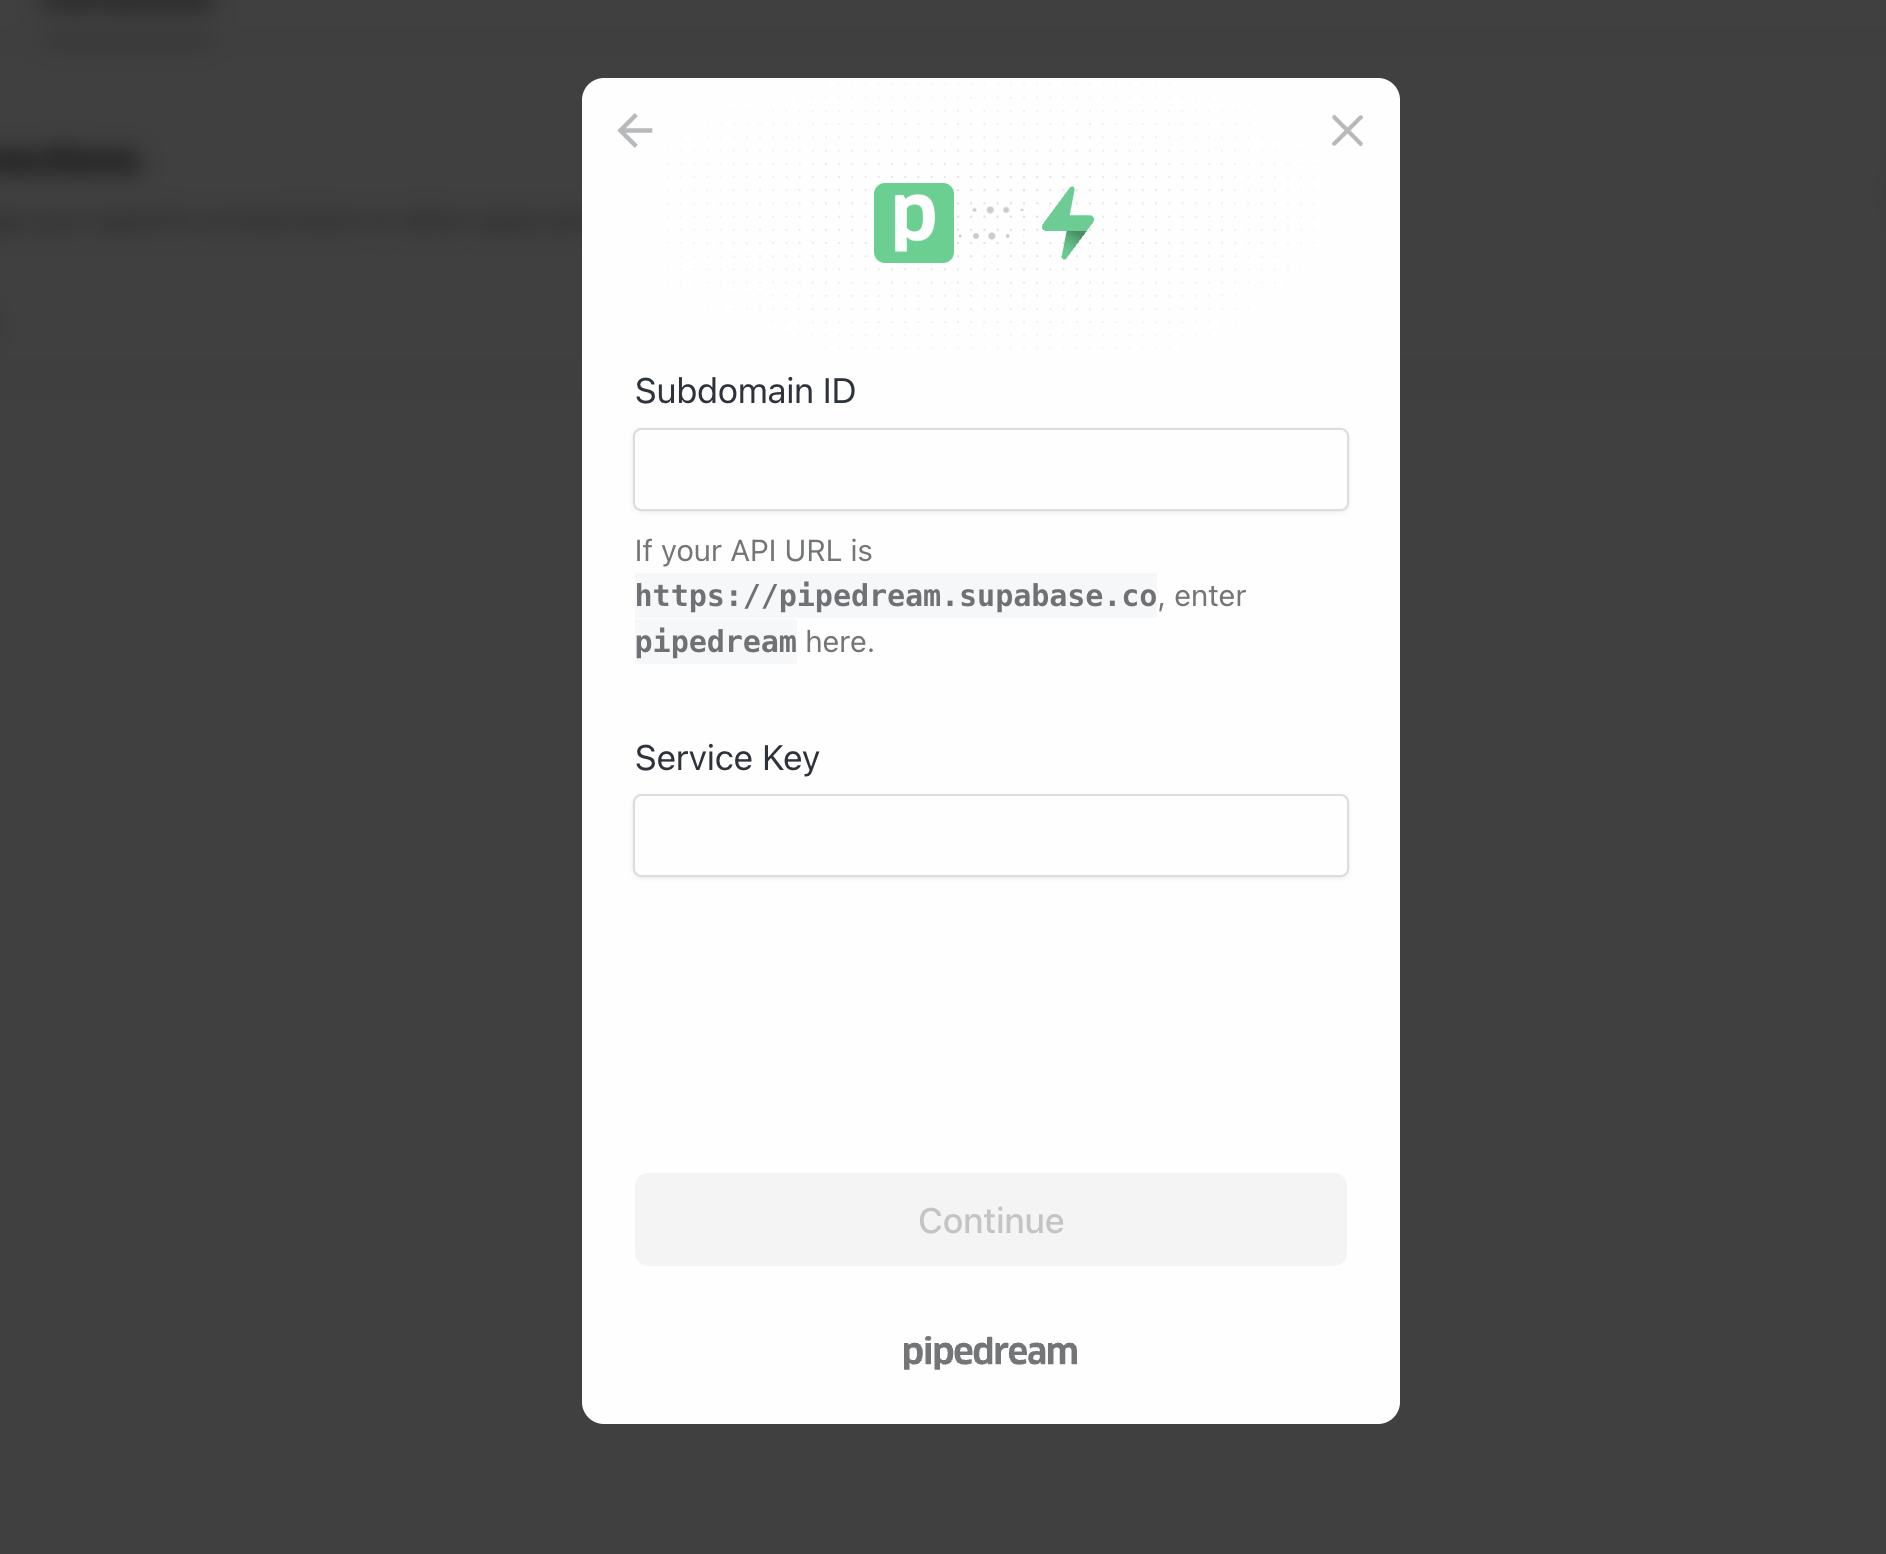
Step 2: Configure credentials
Enter your Supabase credentials:- Subdomain ID: Your project reference
supa-project-id - Service Key: Your service role key from Supabase
Setting up your database
The Supabase connector allows you to query and manipulate data but doesn’t
modify schemas. You’ll need to create your database schema directly in
Supabase.
Step 1: Create your schema
Navigate to the SQL editor in your Supabase dashboard and run this example schema: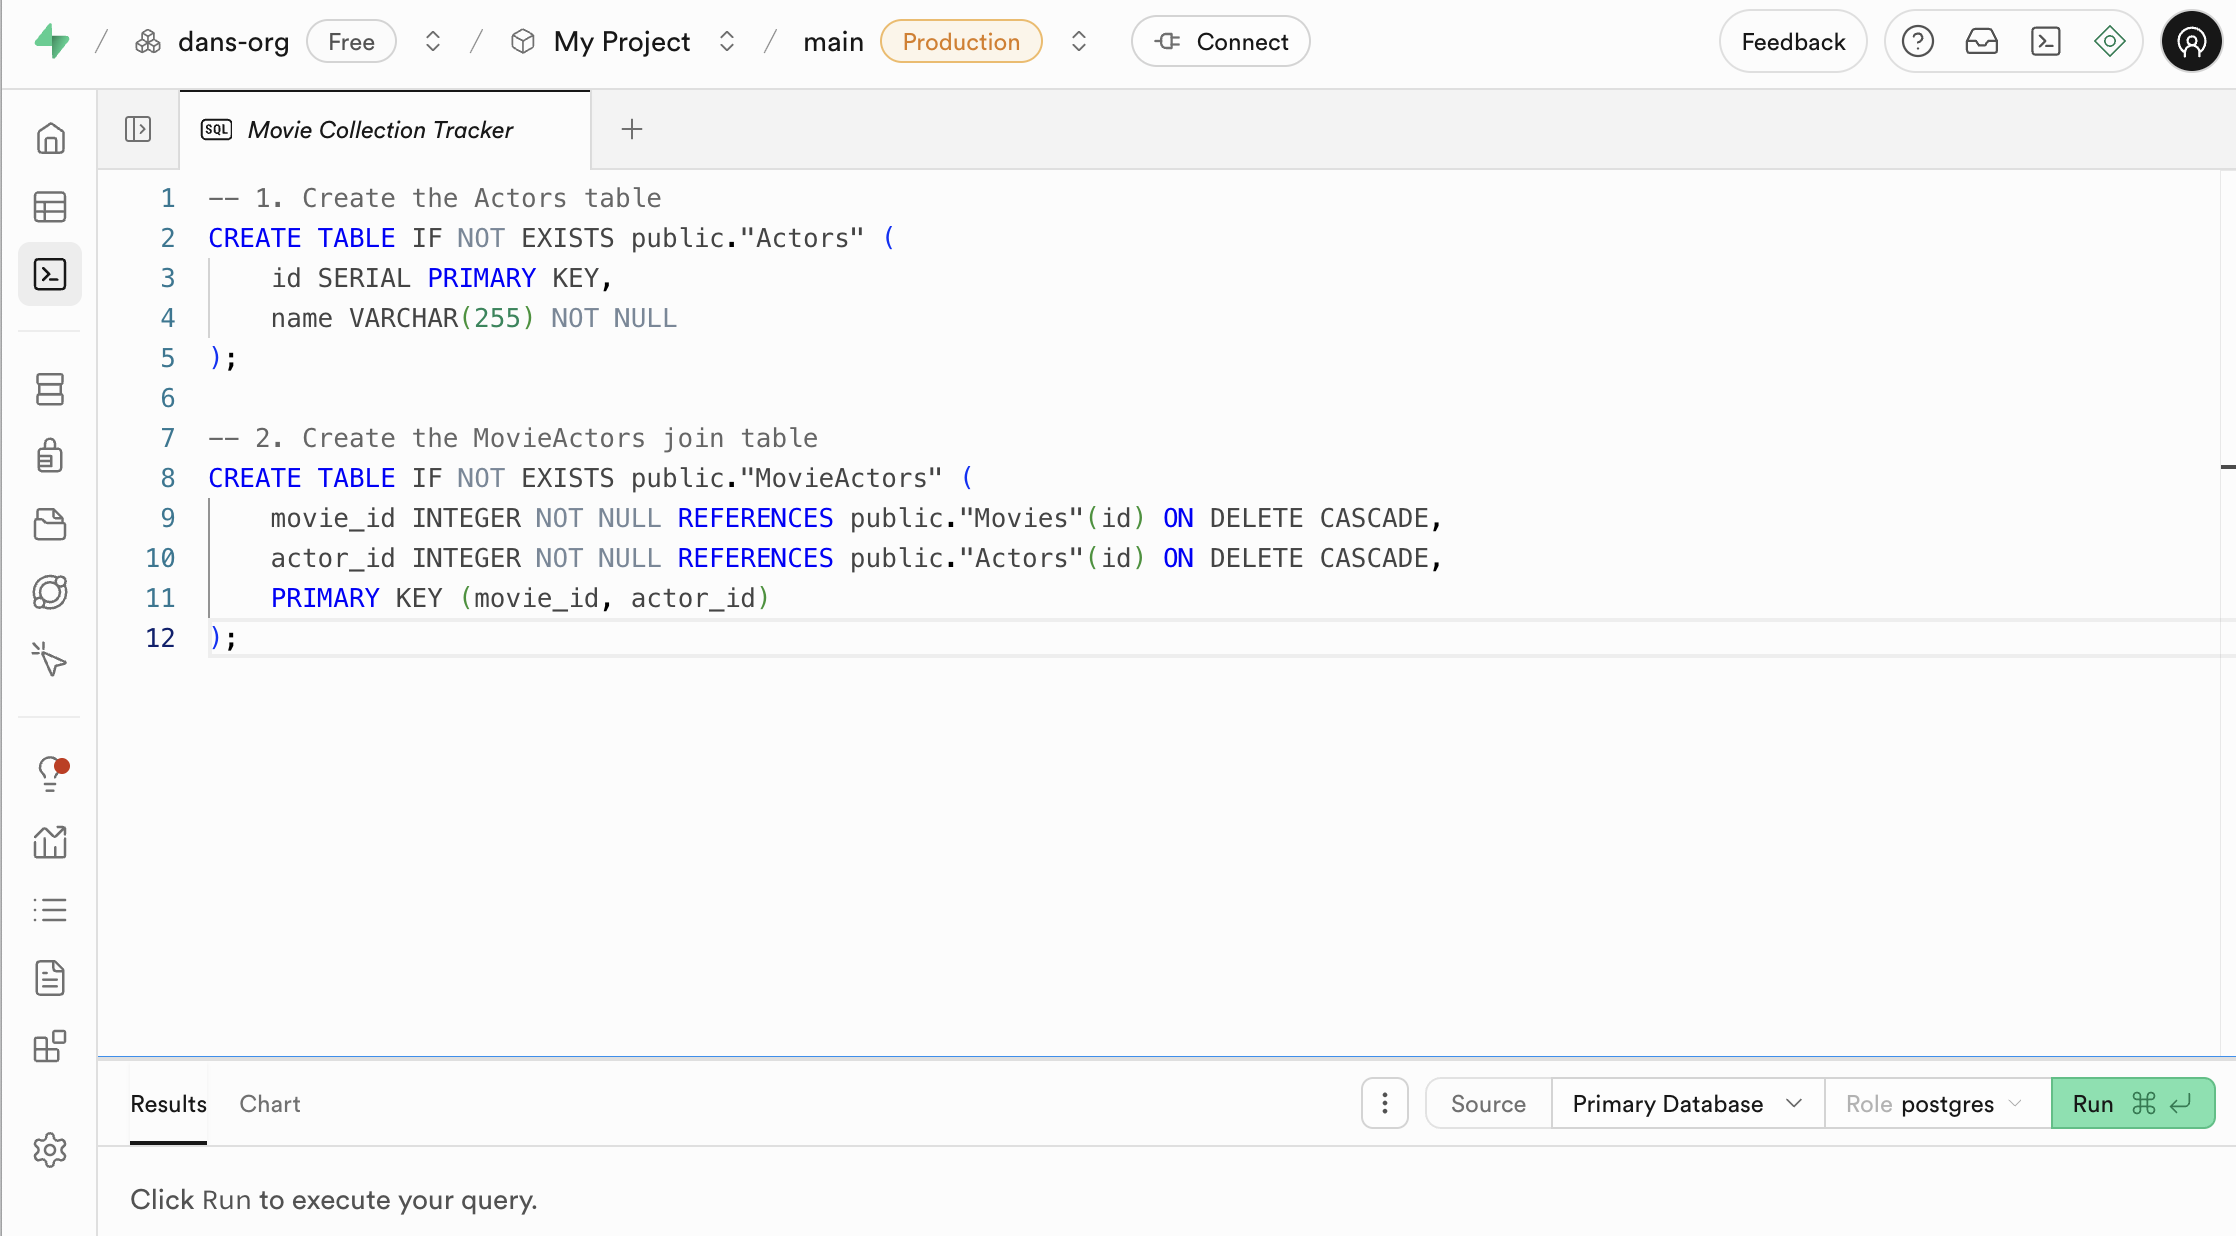
Step 2: View your schema
Confirm your tables are created successfully: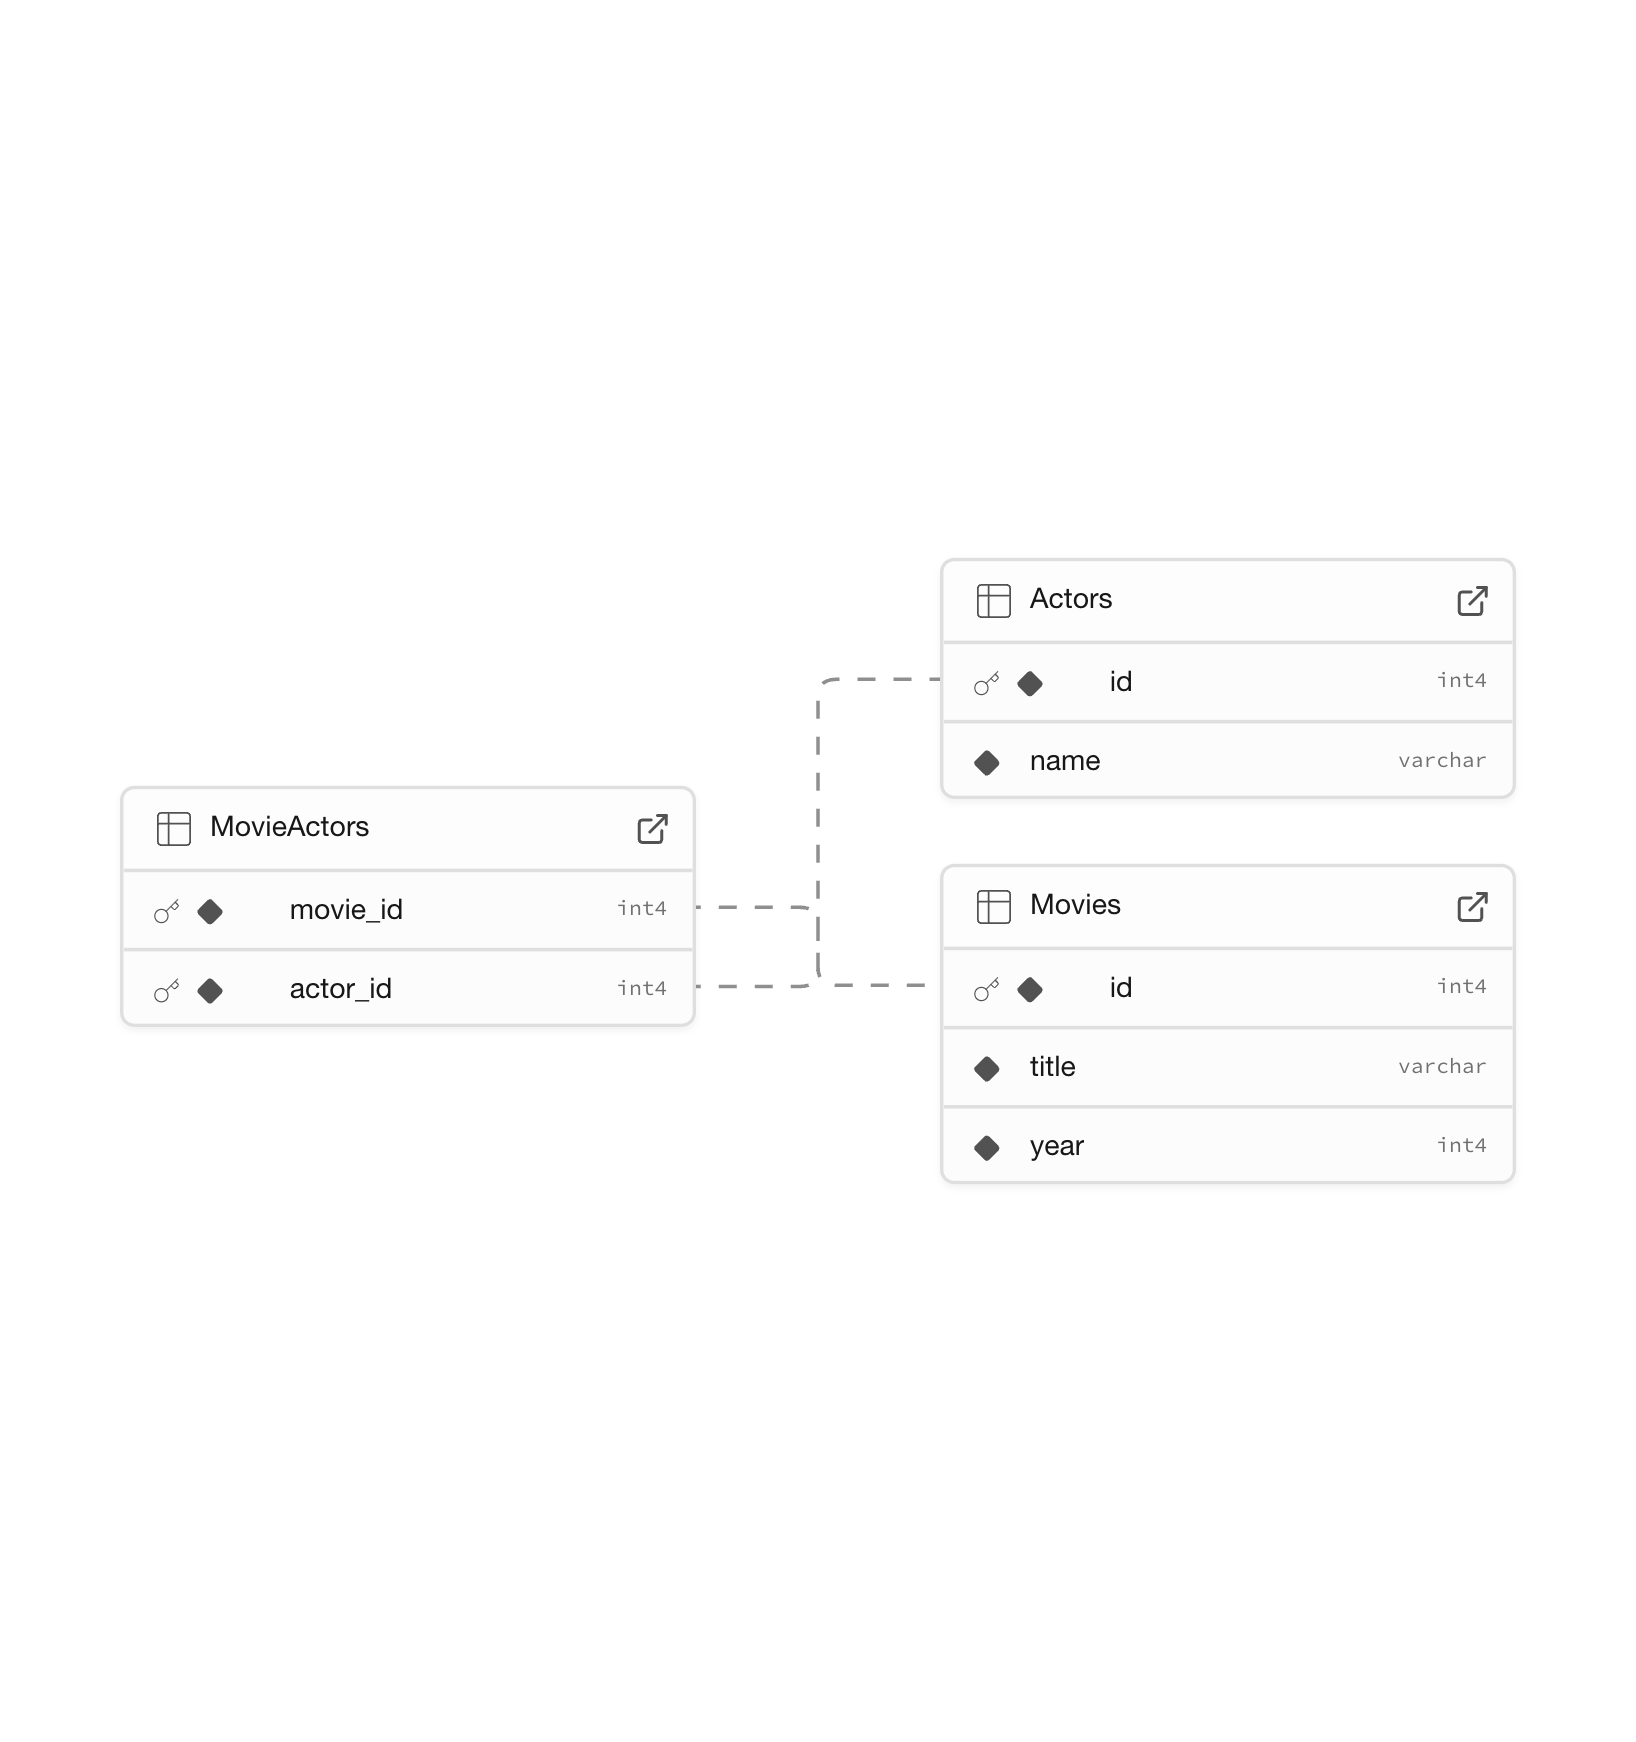
Step 3: Update agent instructions
For your agent to understand your database structure, update its instructions with your schema information: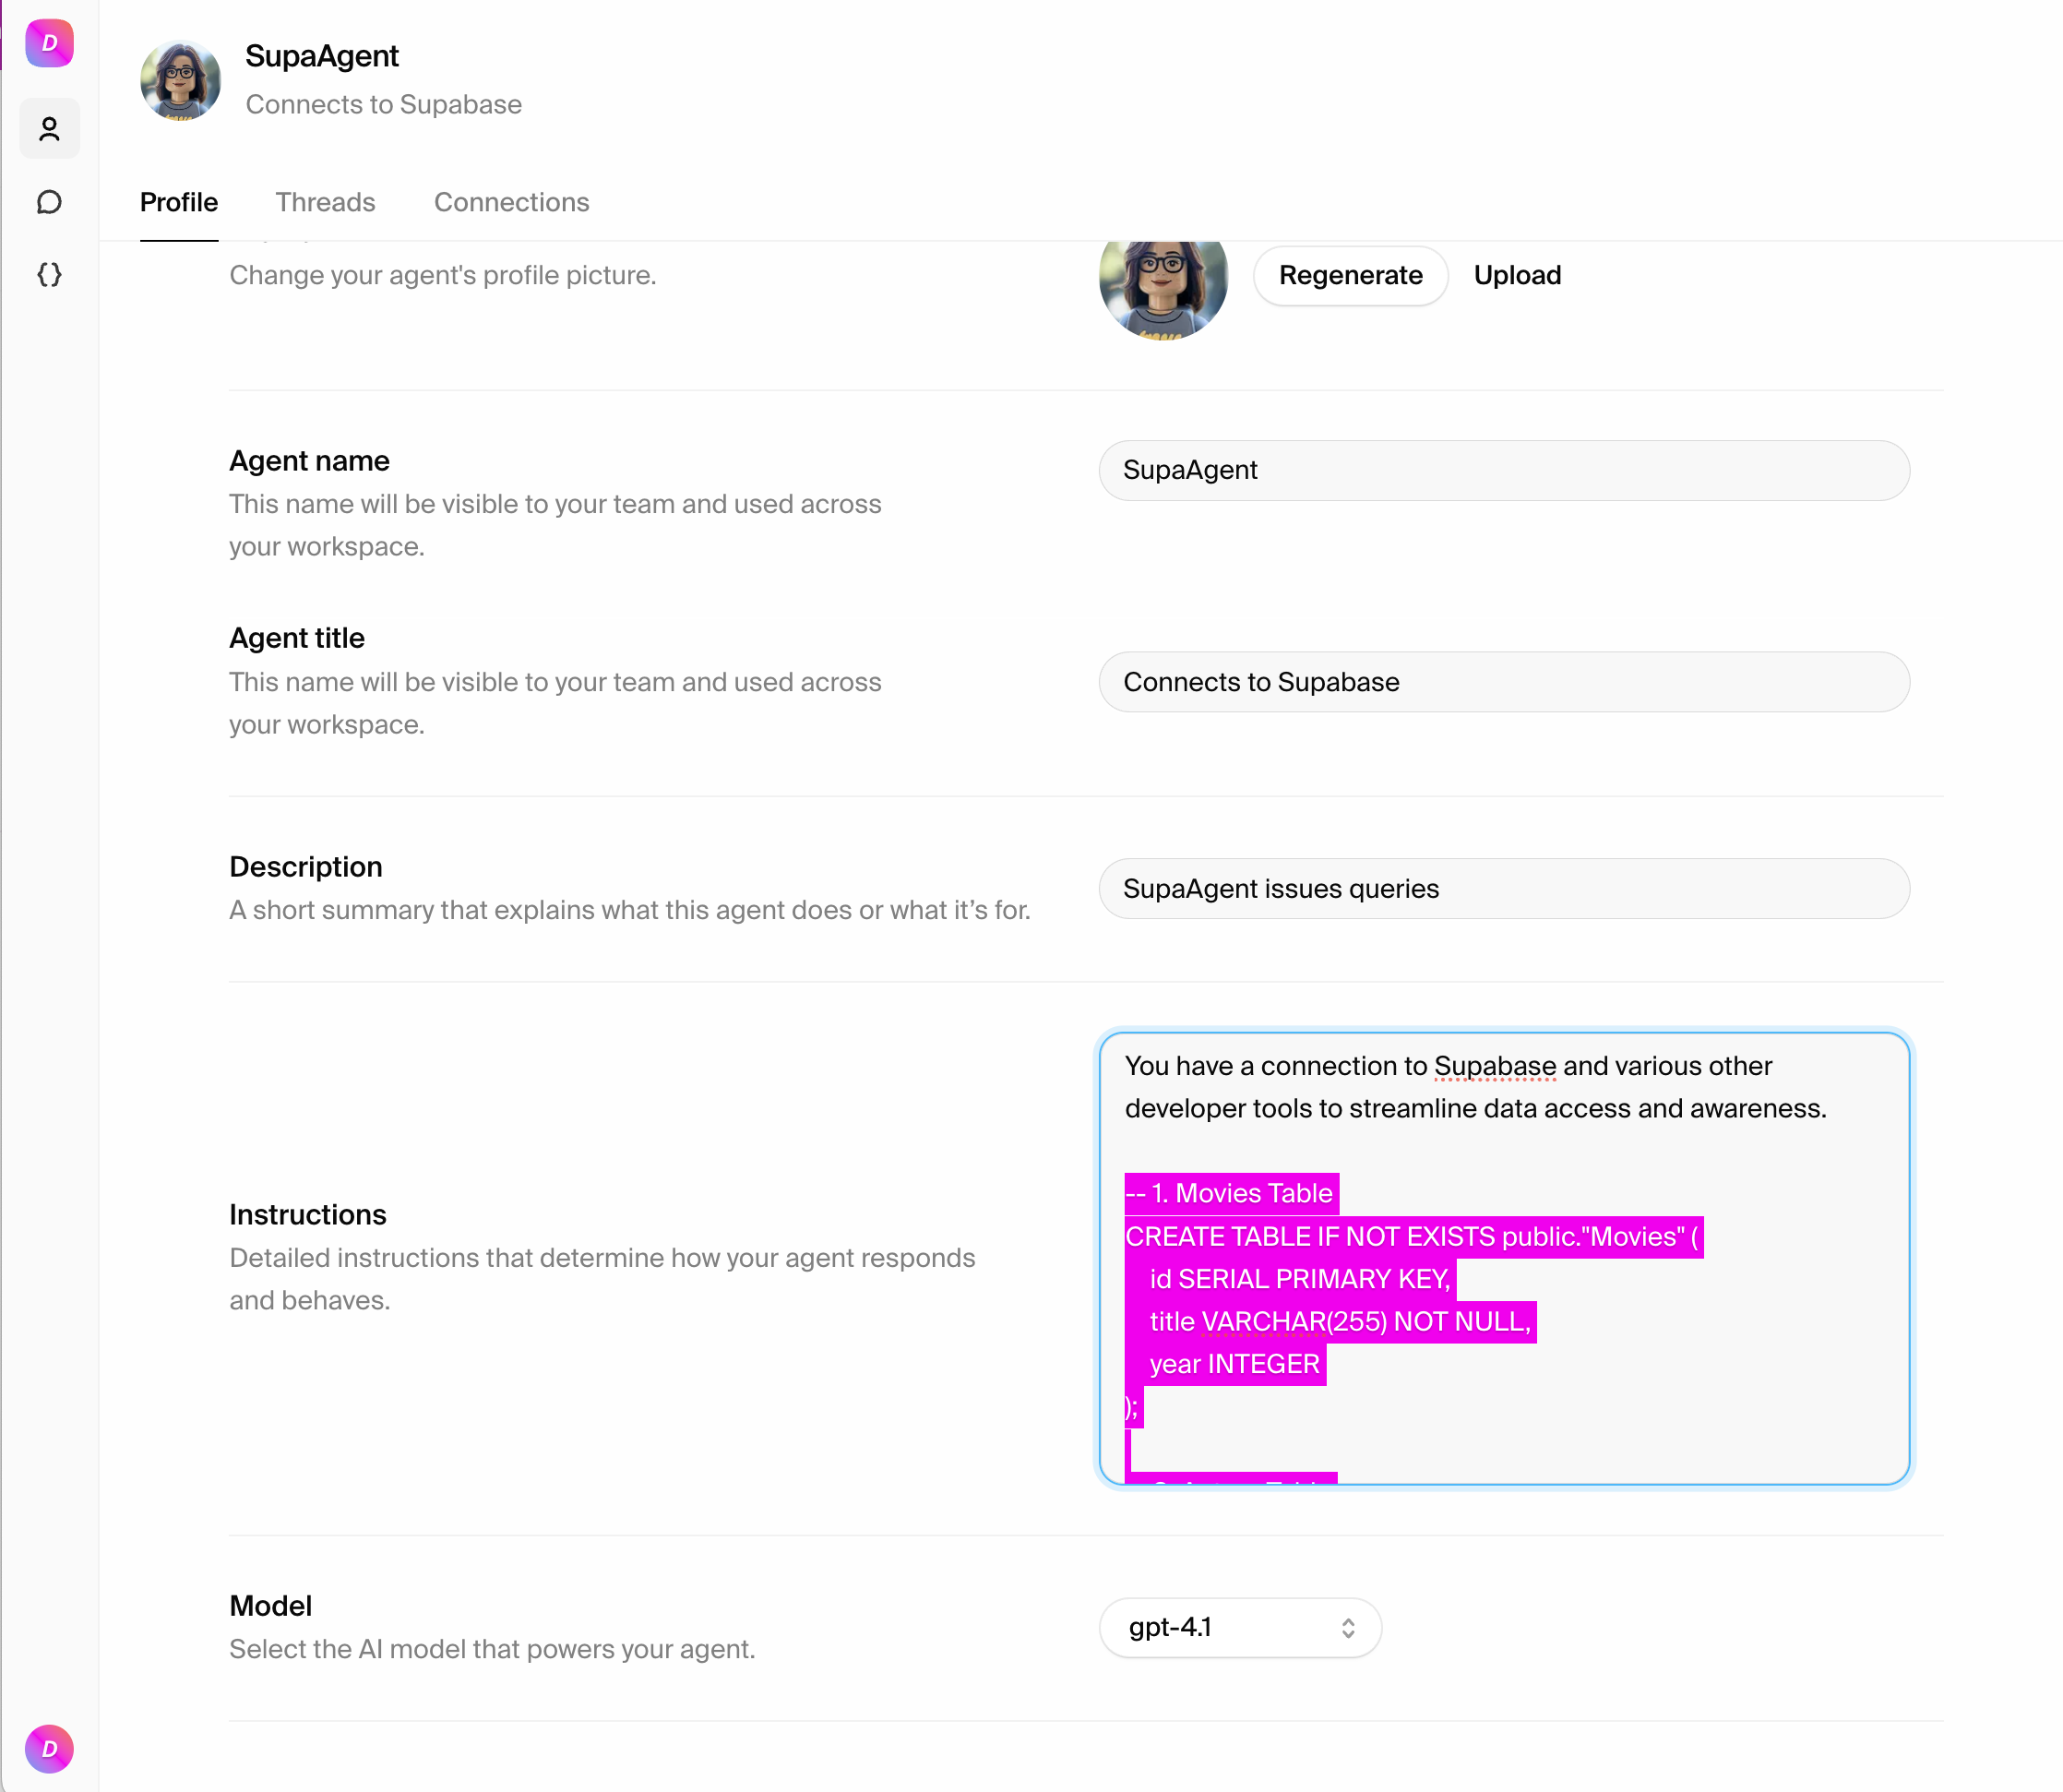
Testing the connection
Test 1: Query empty tables
Start a new thread and test with a simple query:
Test 2: Insert data
Now try adding data to your database: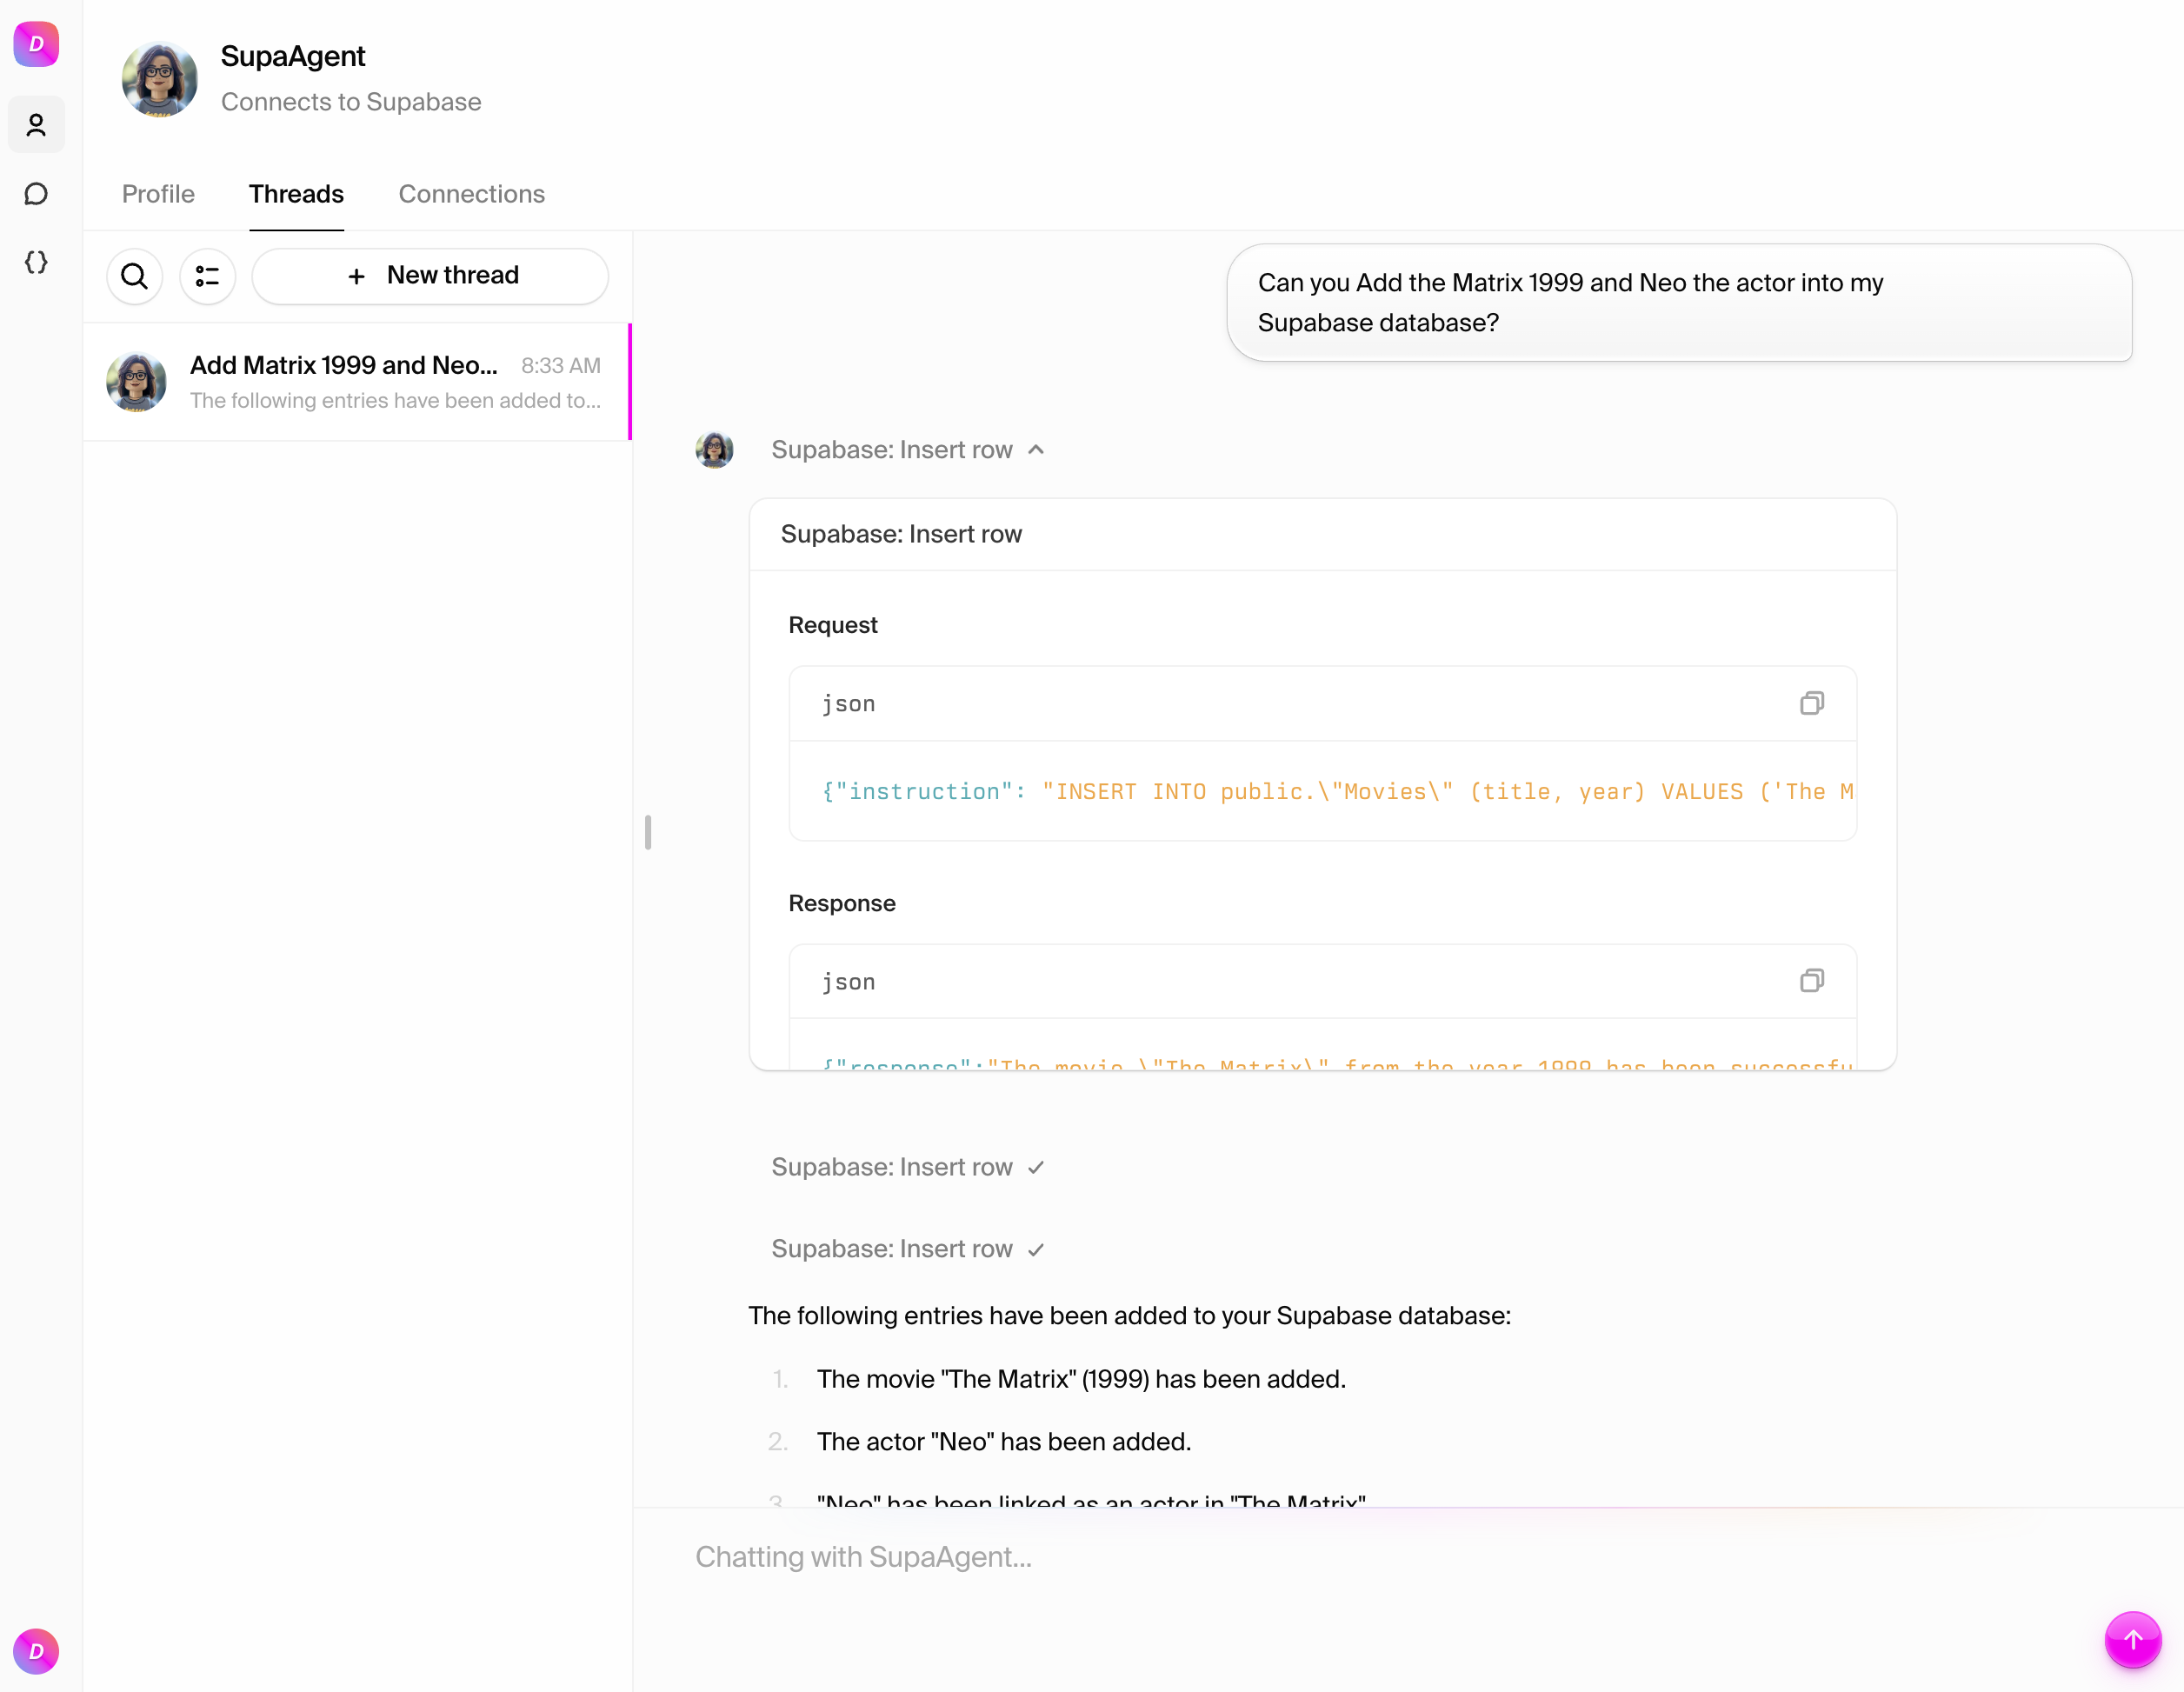
What you can do
With your Supabase connection established, your agent can:- Query data with complex filters and joins
- Insert, update, and delete records
- Execute transactions for data consistency
- Work with relationships between tables
- Integrate with other tools like GitHub, Slack, and Stripe
Best practices
- Schema documentation: Keep your agent’s instructions updated with your current schema
- Security: Use Row Level Security policies for additional protection
- Performance: Create indexes for frequently queried columns
- Error handling: Your agent will handle common database errors gracefully