What’s Hypermode?
Hypermode is framework designed to simplify the development and deployment of AI features and assistants. With its Functions SDK and runtime, developers can quickly deploy intelligent features into production without the need for extensive data wrangling. Hypermode supports rapid iteration, allowing you to start with a large language model and later fine-tune smaller, open source models. Its production-ready GraphQL API auto-generates and enables seamless integration. Hypermode is ideal for developers looking to quickly prototype and evolve AI capabilities.Quickstart
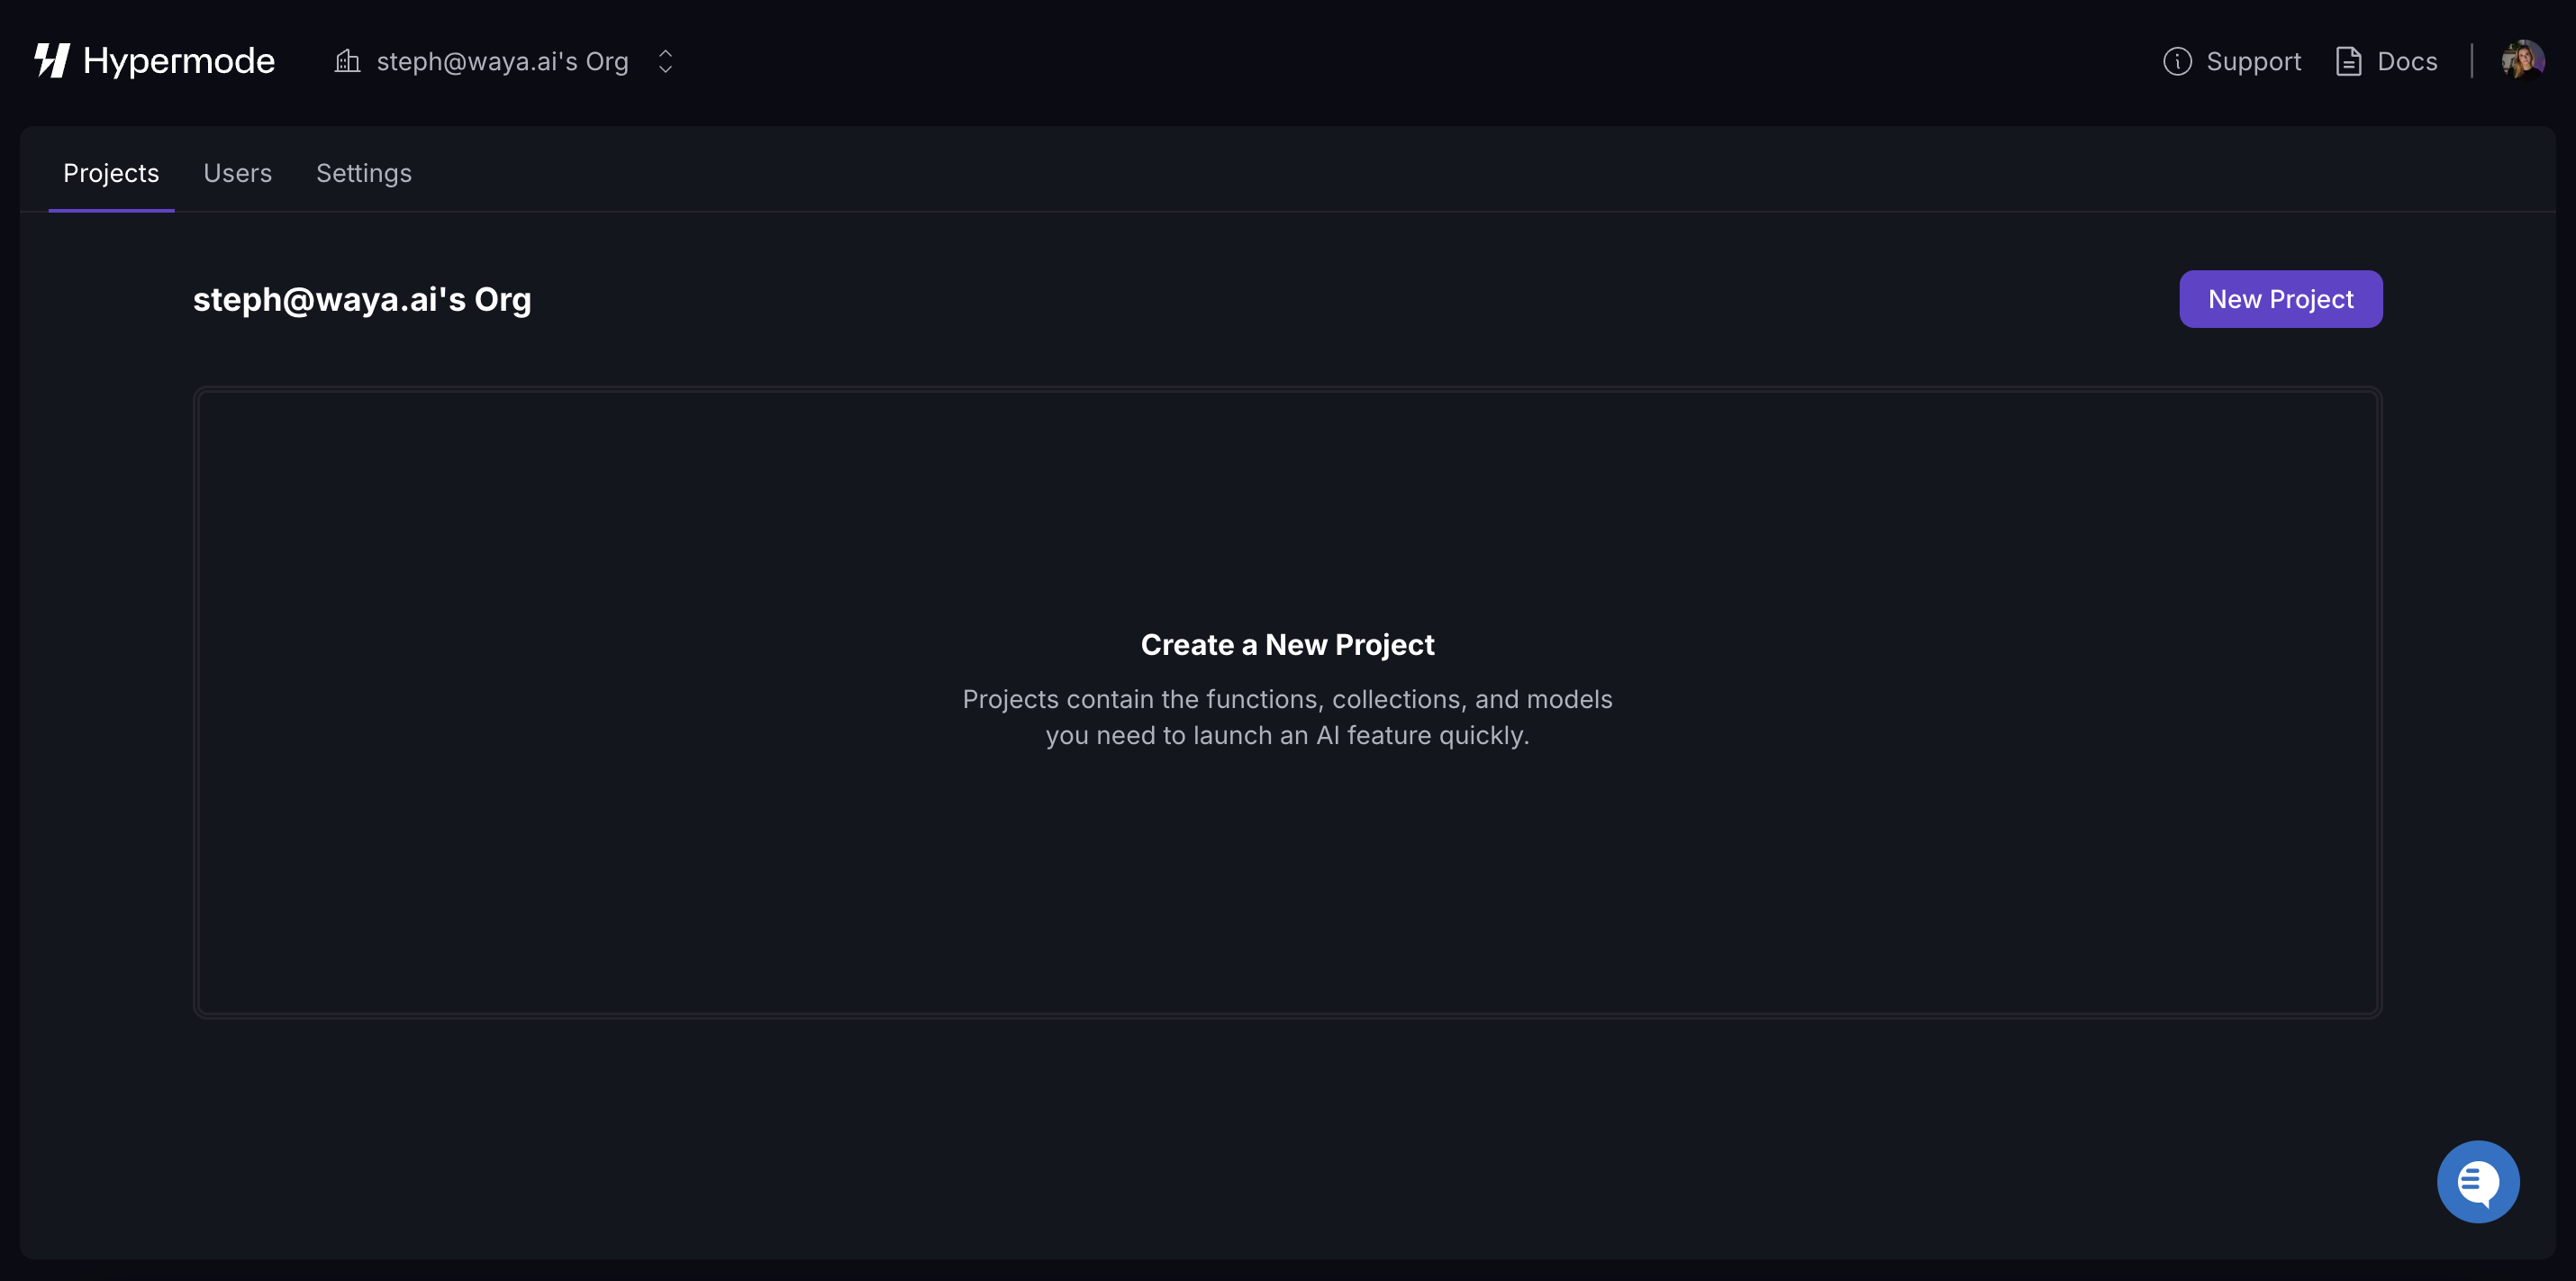
You can get started with Hypermode’s Instant Vector Search template using either sample data or your own, without needing to write any code or set up a GitHub repository. This lets you explore the template and Hypermode’s features before committing any time and effort.Step 1: Creating a new project
- Visit the Hypermode website and sign up with your GitHub, Google, or email address. Once signed in, you’ll see the Hypermode projects dashboard.
-
After accessing your dashboard, click the “Create New Project” button
-
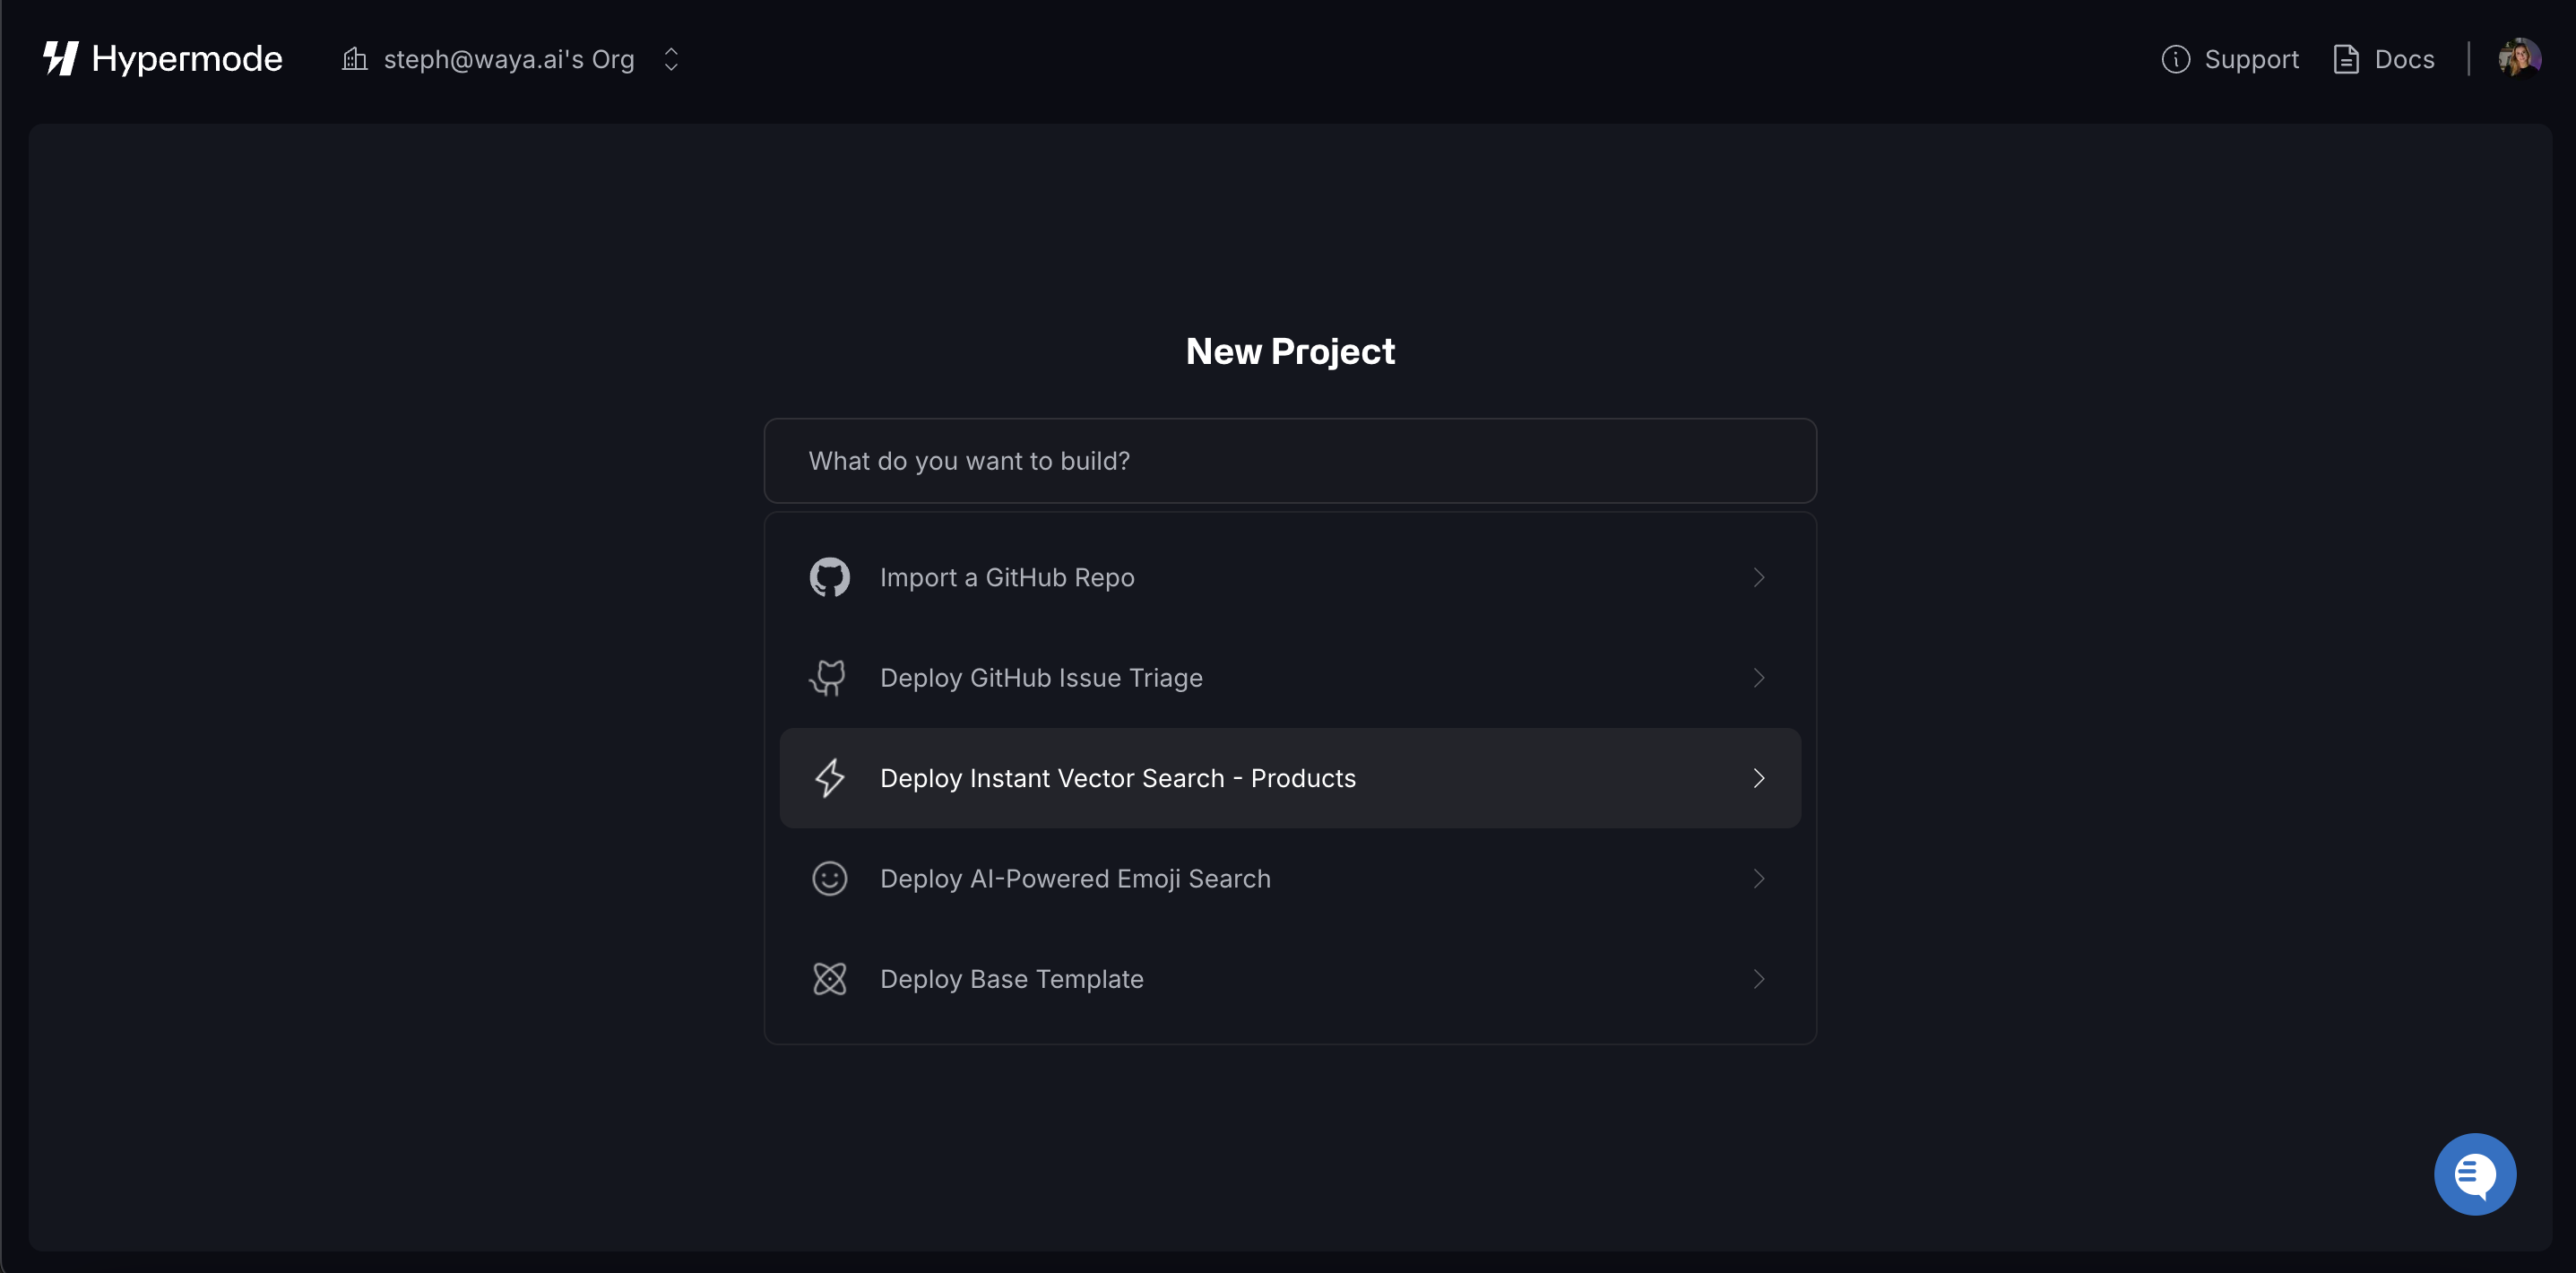
Select “Deploy Instant Vector Search” from the options.
-
Choose between using sample data or your own data:
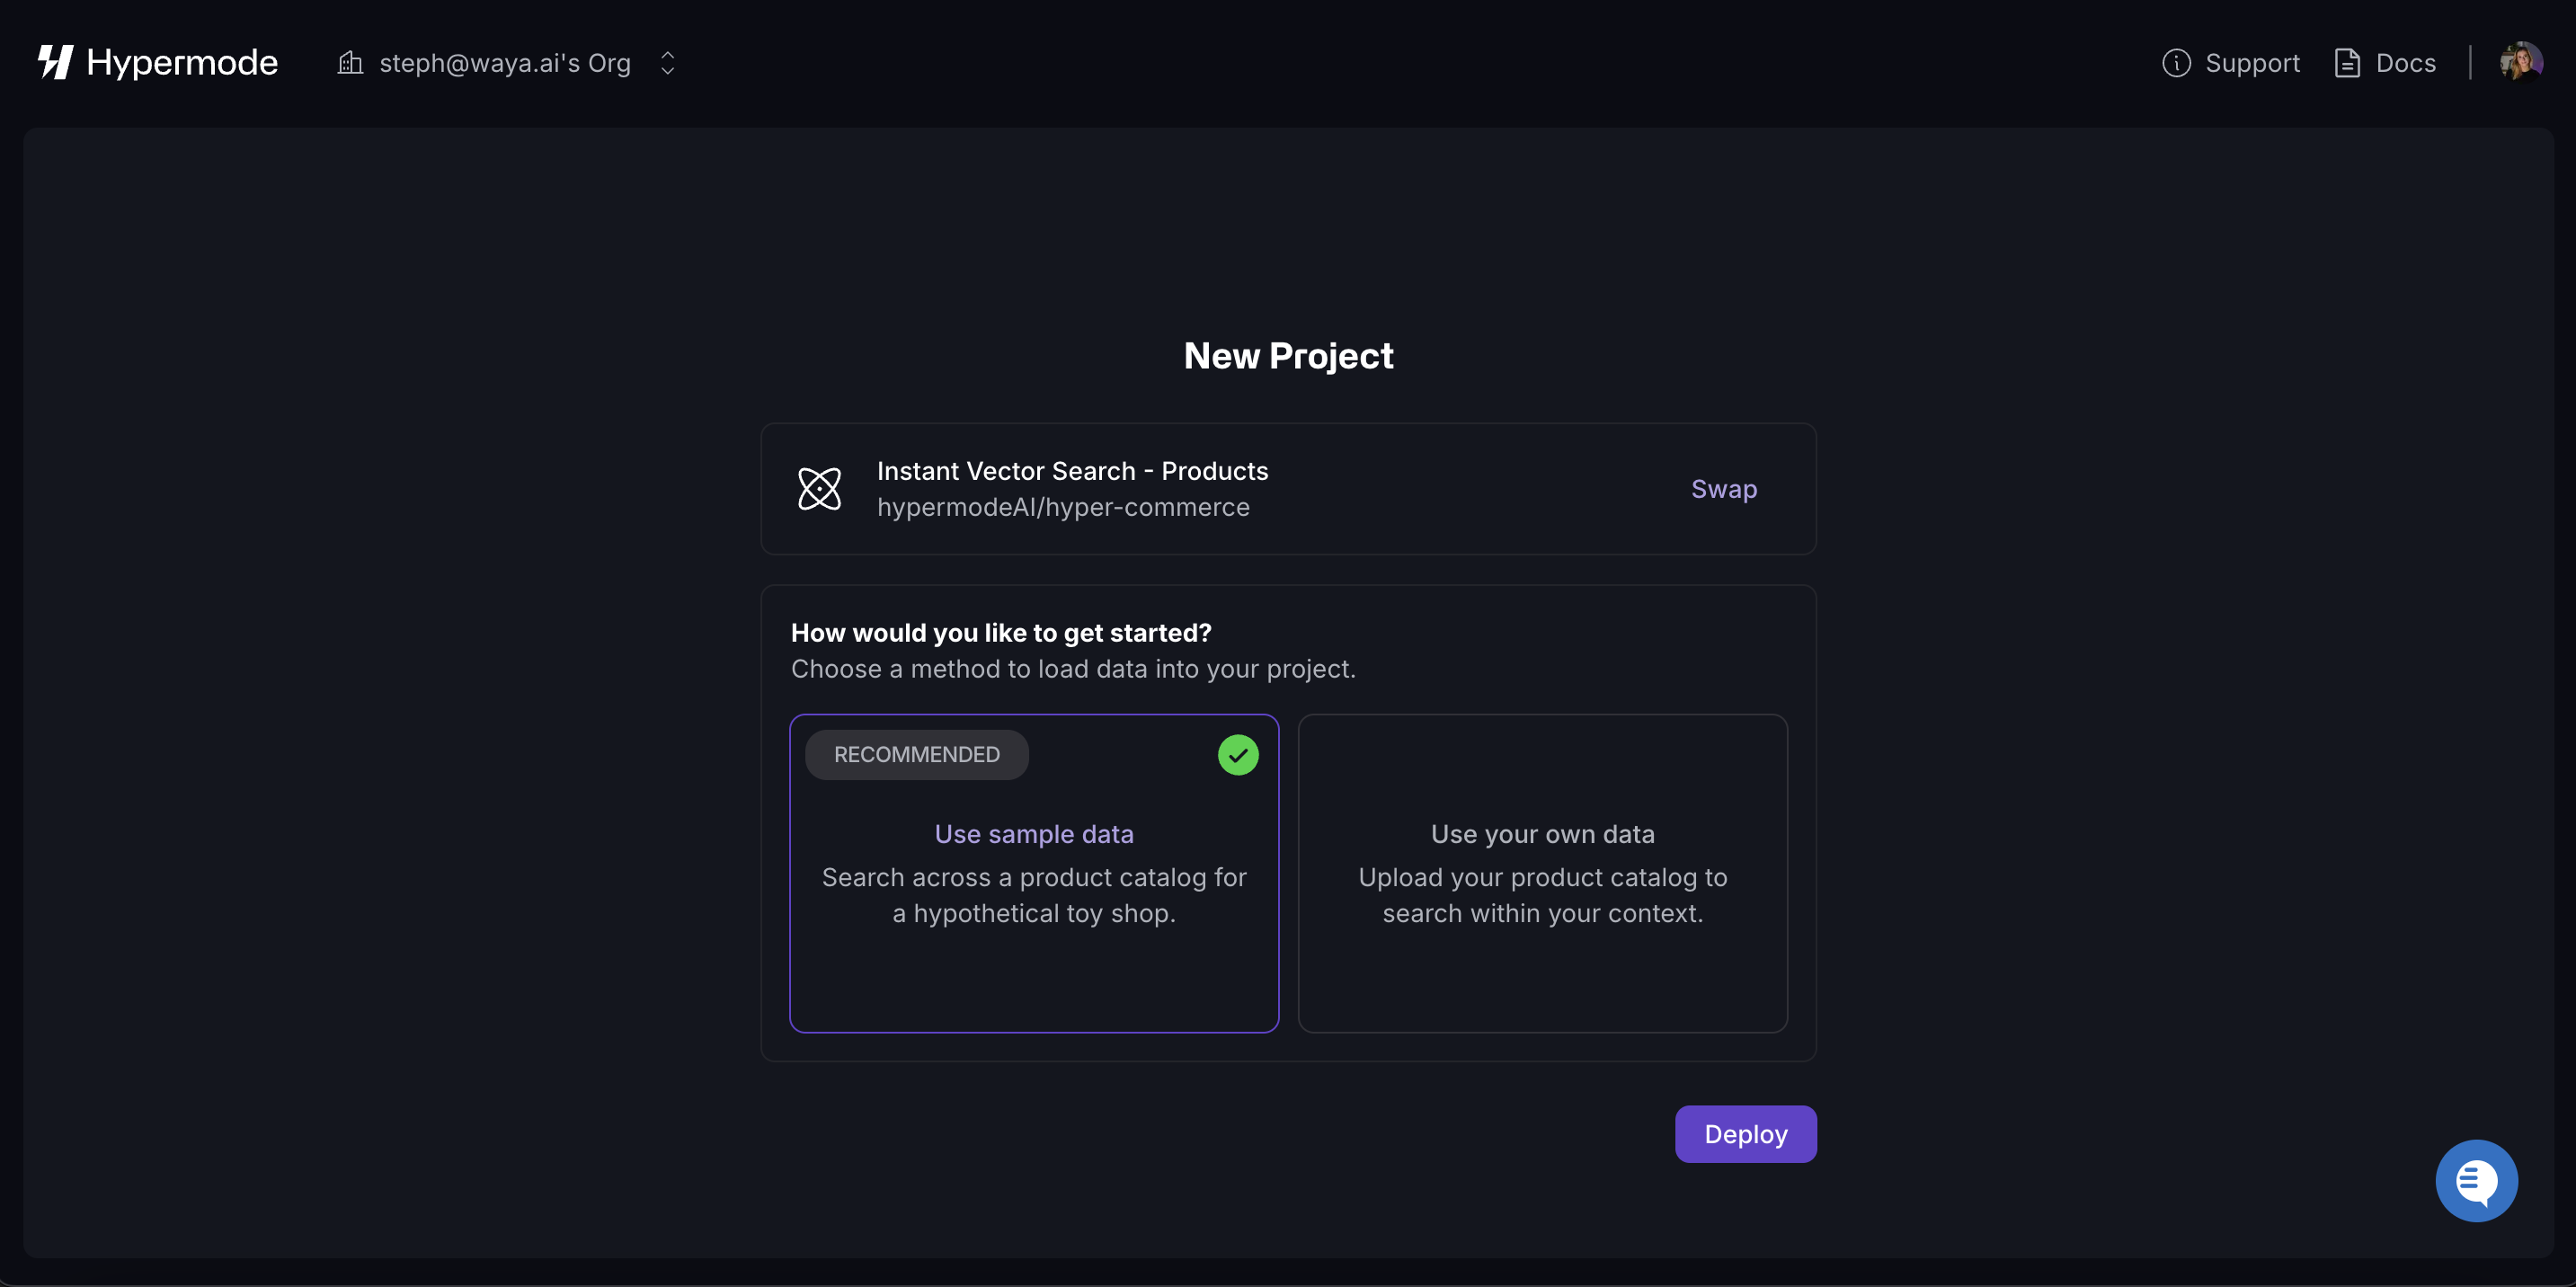
If you choose to use your own data, you’ll need to upload it using a CSV file and a Python script provided in Step 2.
- Once created, Hypermode provisions a runtime with instant connectivity to shared AI models that bring the functions within your project to life. The source code for the project is open source, available in this repository.
Step 2: Adding your data
If you selected sample data, your project is fully setup. You can move on to Step 3 and immediately start exploring the project and its features. If you chose to use your own data, follow these steps to seed your data into the collections:-
Ensure you have Python installed on your
machine. You can verify this by running
python --versionorpython3 --versionin your terminal. -
Prepare your CSV file with the following headers:
Unique Id,Product Name,Category,Selling Price,About Product,Image,Num Stars,In Stock. - Copy the script from this file.
- Update the script with your endpoint (located in your projects dashboard), API key (located in the settings tab of your Hypermode console), and the path to your CSV file.
-
Install the necessary dependencies:
-
Run the script to populate your data:
Step 3: Exploring the Console
In the Hypermode console, you’ll see several key components of your project: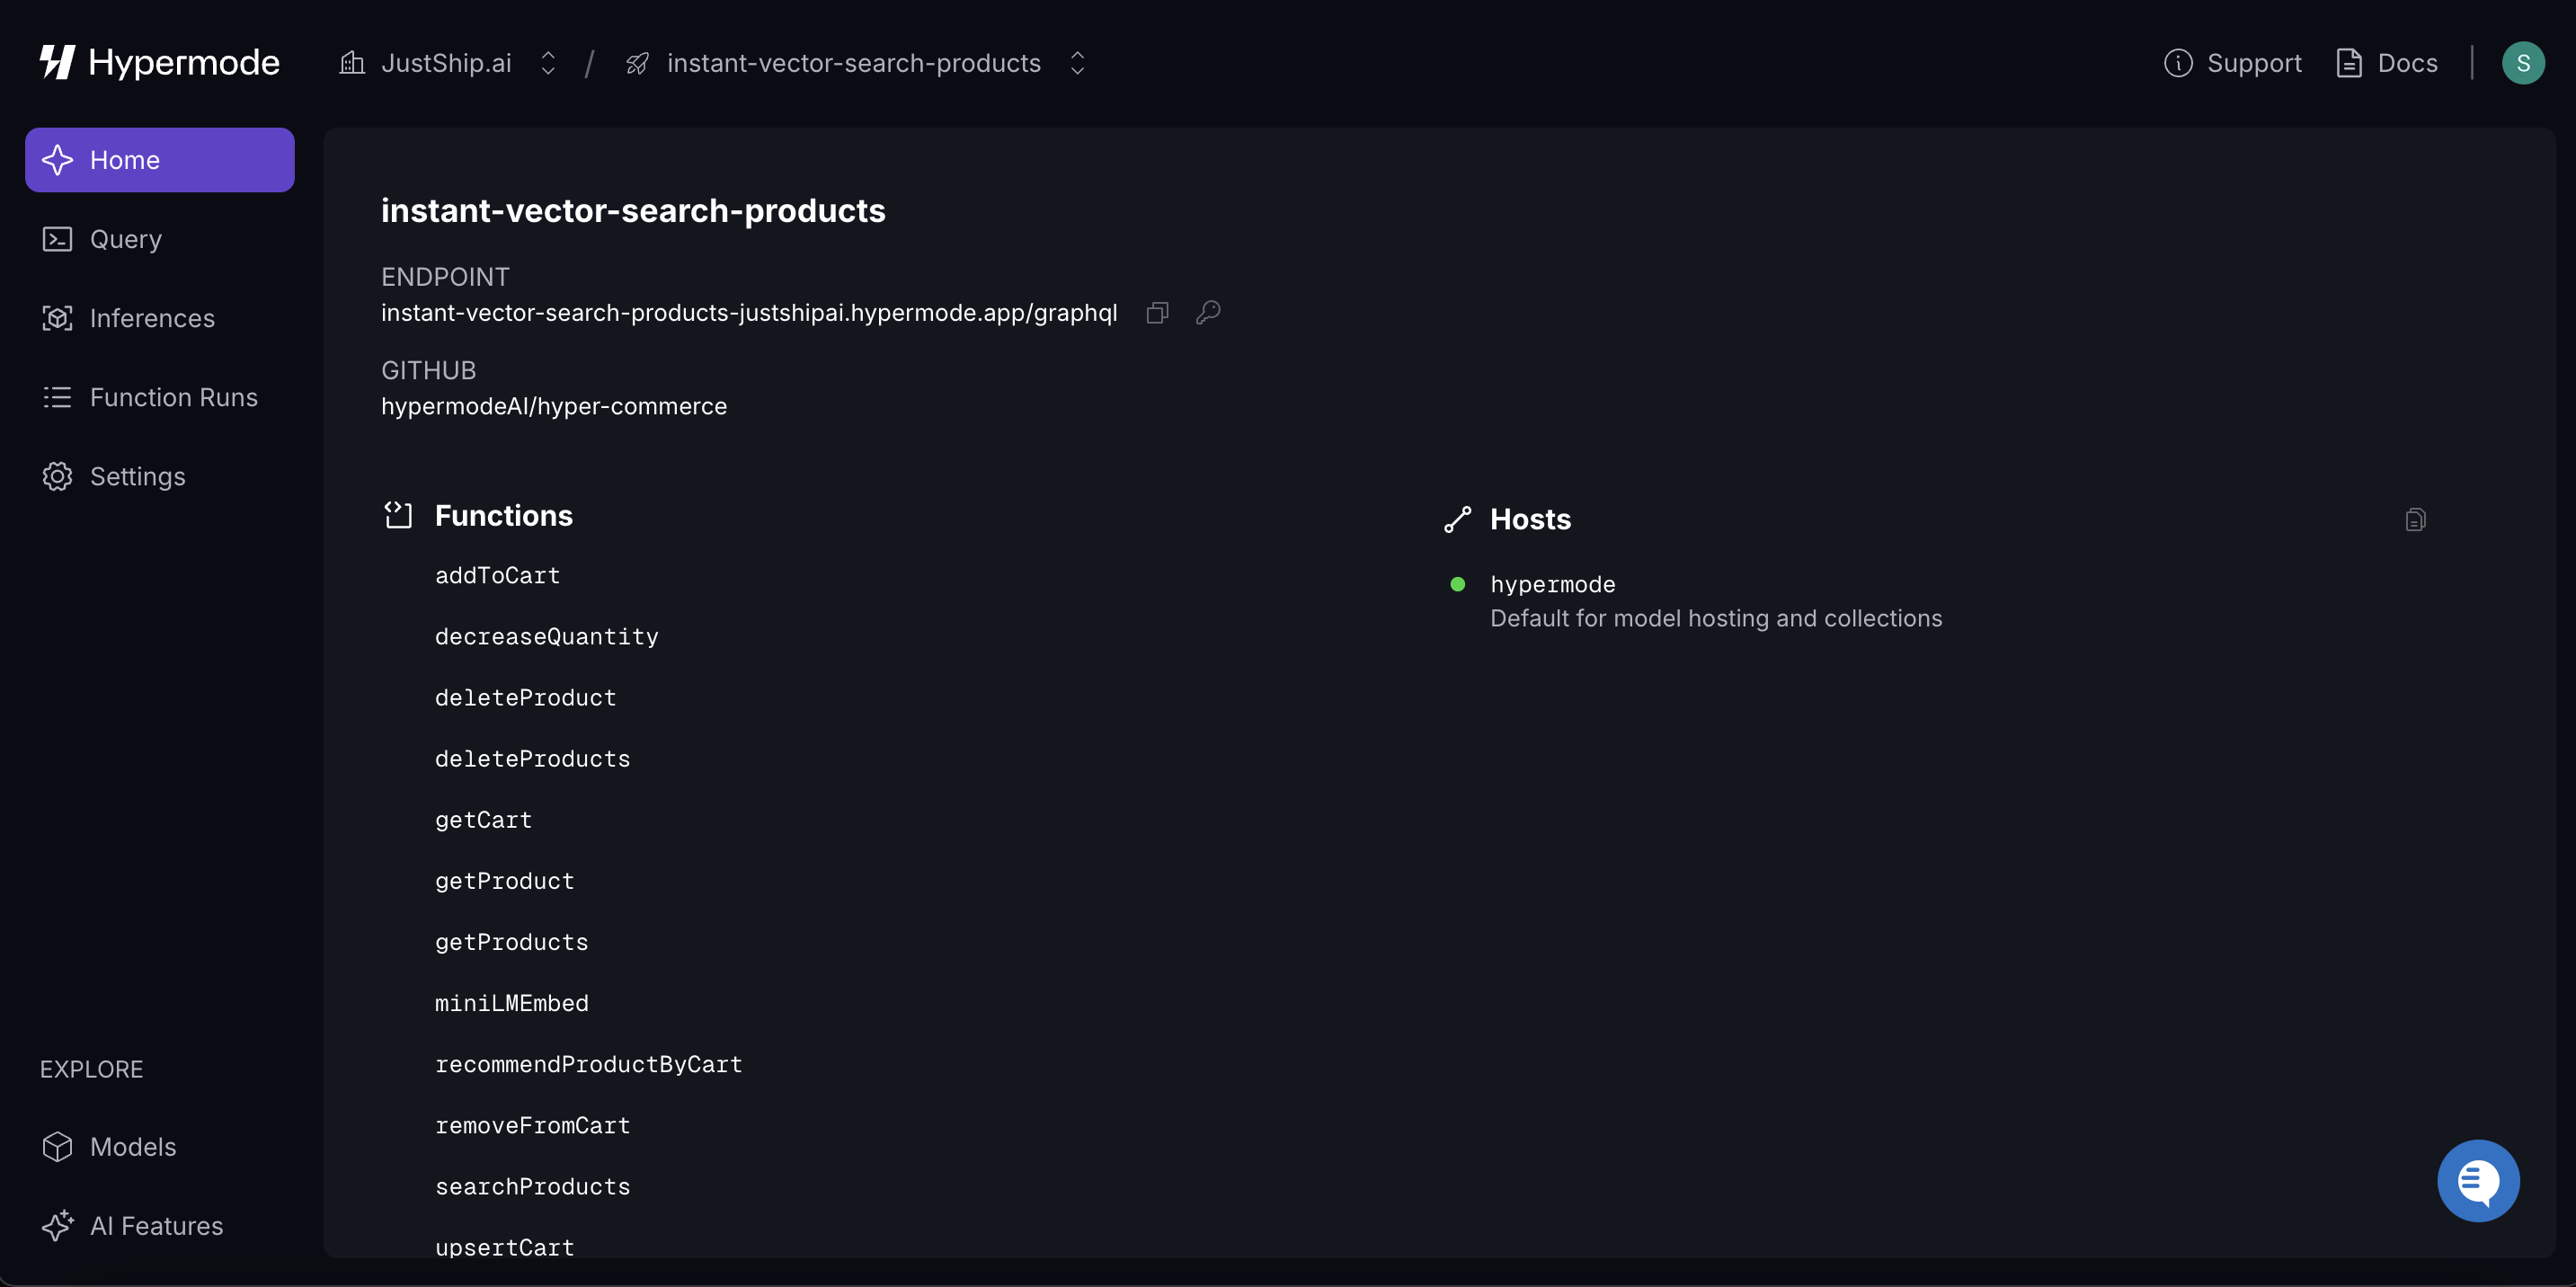
- Functions: These are serverless functions written in AssemblyScript (a TypeScript-like language) that are automatically exposed as GraphQL APIs. Once deployed, you can query these functions within your app.
- Models: This section represents the AI models defined for your project. These models handle tasks like embedding text into vectors for search. Hypermode provides open source shared and dedicated model hosting for rapid experimentation. You can also connect to your preferred large language model, including OpenAI, Anthropic, and Gemini.
- Connections: You define all external connections, with the runtime denying all other egress for secure-by-default processing.
- Endpoint: The GraphQL endpoint for your project, which you’ll use to interact with your APIs and query your data.
Step 4: Querying your data
Now that you set up, deployed, and seeded your project with data, you can test your functions using the query interface in the Hypermode console.- Navigate to the Query tab in your Hypermode console to test your data.
-
Paste the following query to retrieve sample product data:
-
You should see the data for 4 items returned from the
searchProductsendpoint that match your query,sparkly shoes. Feel free to experiment with the query—adjust themaxItemsvalue to return more items, or change the search query to see how the returned data matches your input. Additionally, notice that the function ranks items based on their star rating and whether they’re in stock.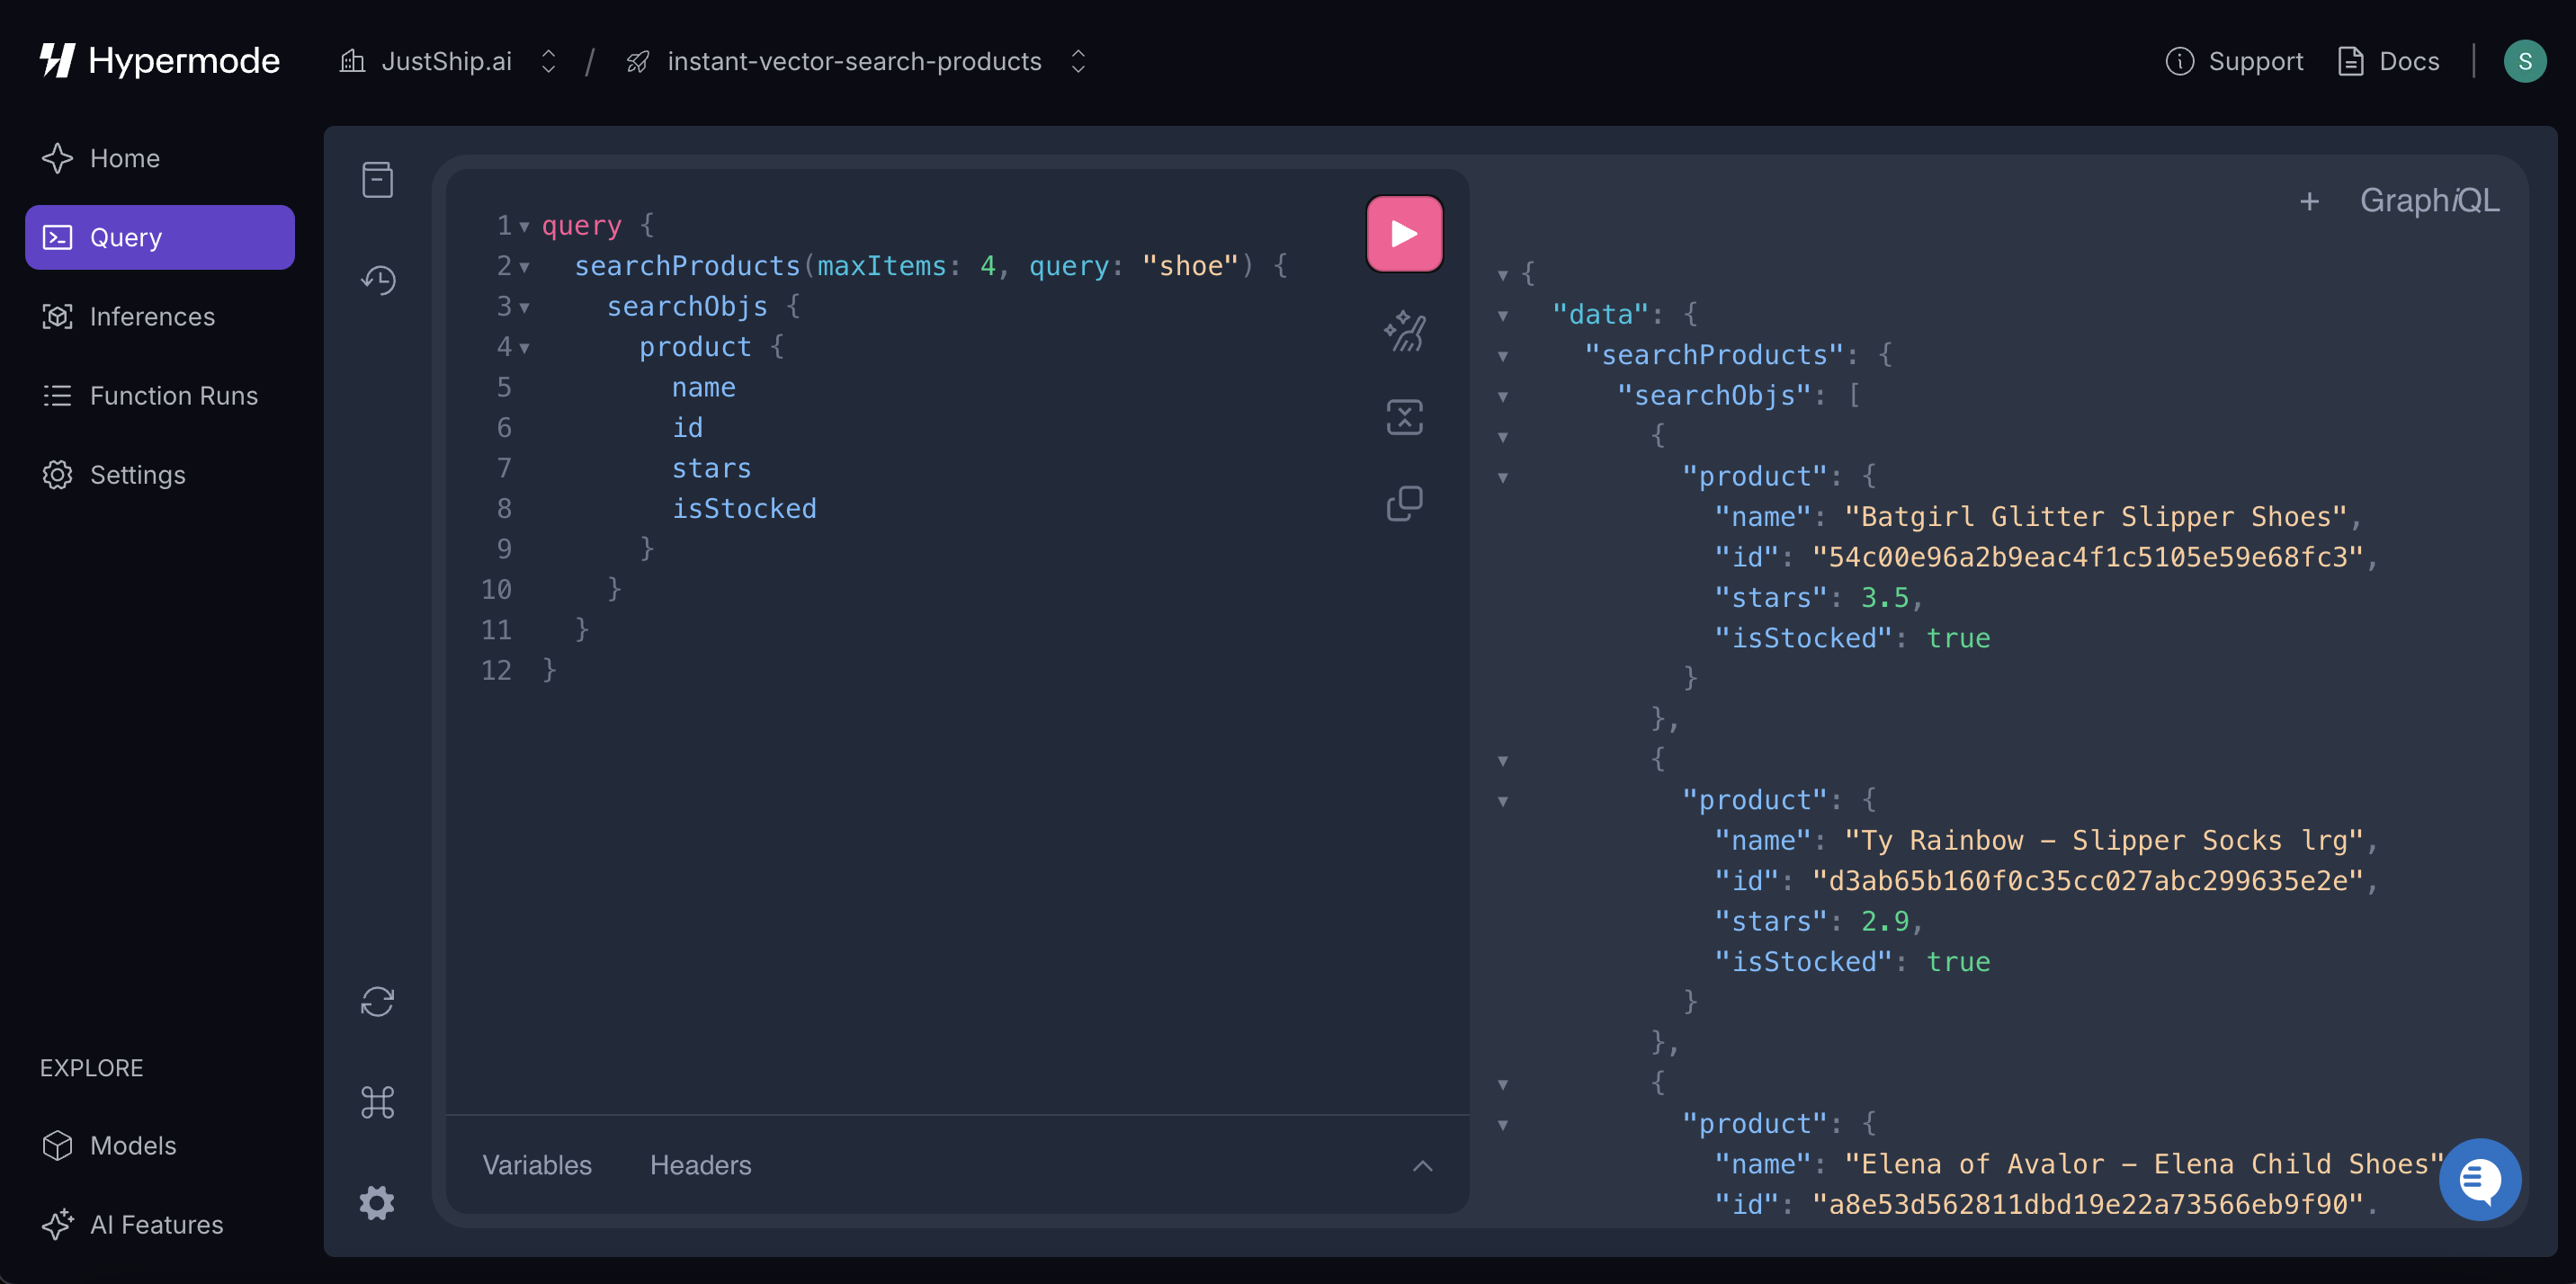
Step 5: Testing in the Frontend
Now that you’ve set up your project and queried your data in the console, you can test the capability in a frontend UI.- Clone the repository that contains a pre-built UI for testing. You can find the repo here.
- Retrieve your API key from the Settings section of your Hypermode console.
-
Create a
.env.localfile in the root of your project and add your API key and endpoint to it, like this: -
Run the project locally by executing the following command:
- With the project running locally, you can now test the search capability in the provided UI. Try searching for products to see how your Hypermode project’s API integrates and returns data.
Note: The intent of this quickstart is for proof of concepts. For more advanced usage, such as customizing search re-ranking logic, you’ll need to clone the template to your own repository to make and push changes. Refer to the next section for further instructions.
Customizing the app
In this section, you’ll learn how to tailor the template to fit your specific needs. We’ll show you how to edit your backend functions and deploy those changes to Hypermode.Step 1: Clone the template repository
- Go to the template repo hyper-commerce.
-
Clone the repo by clicking
Use this templatein the upper-right corner and selectingCreate new repo.This clones the code into your own GitHub repository - Visit the Hypermode website and sign up with your GitHub, Google, or email address. Once signed in, you’ll see your Hypermode projects dashboard.
-
In the Hypermode console, click
New Project. -
Select
Import a GitHub Repo.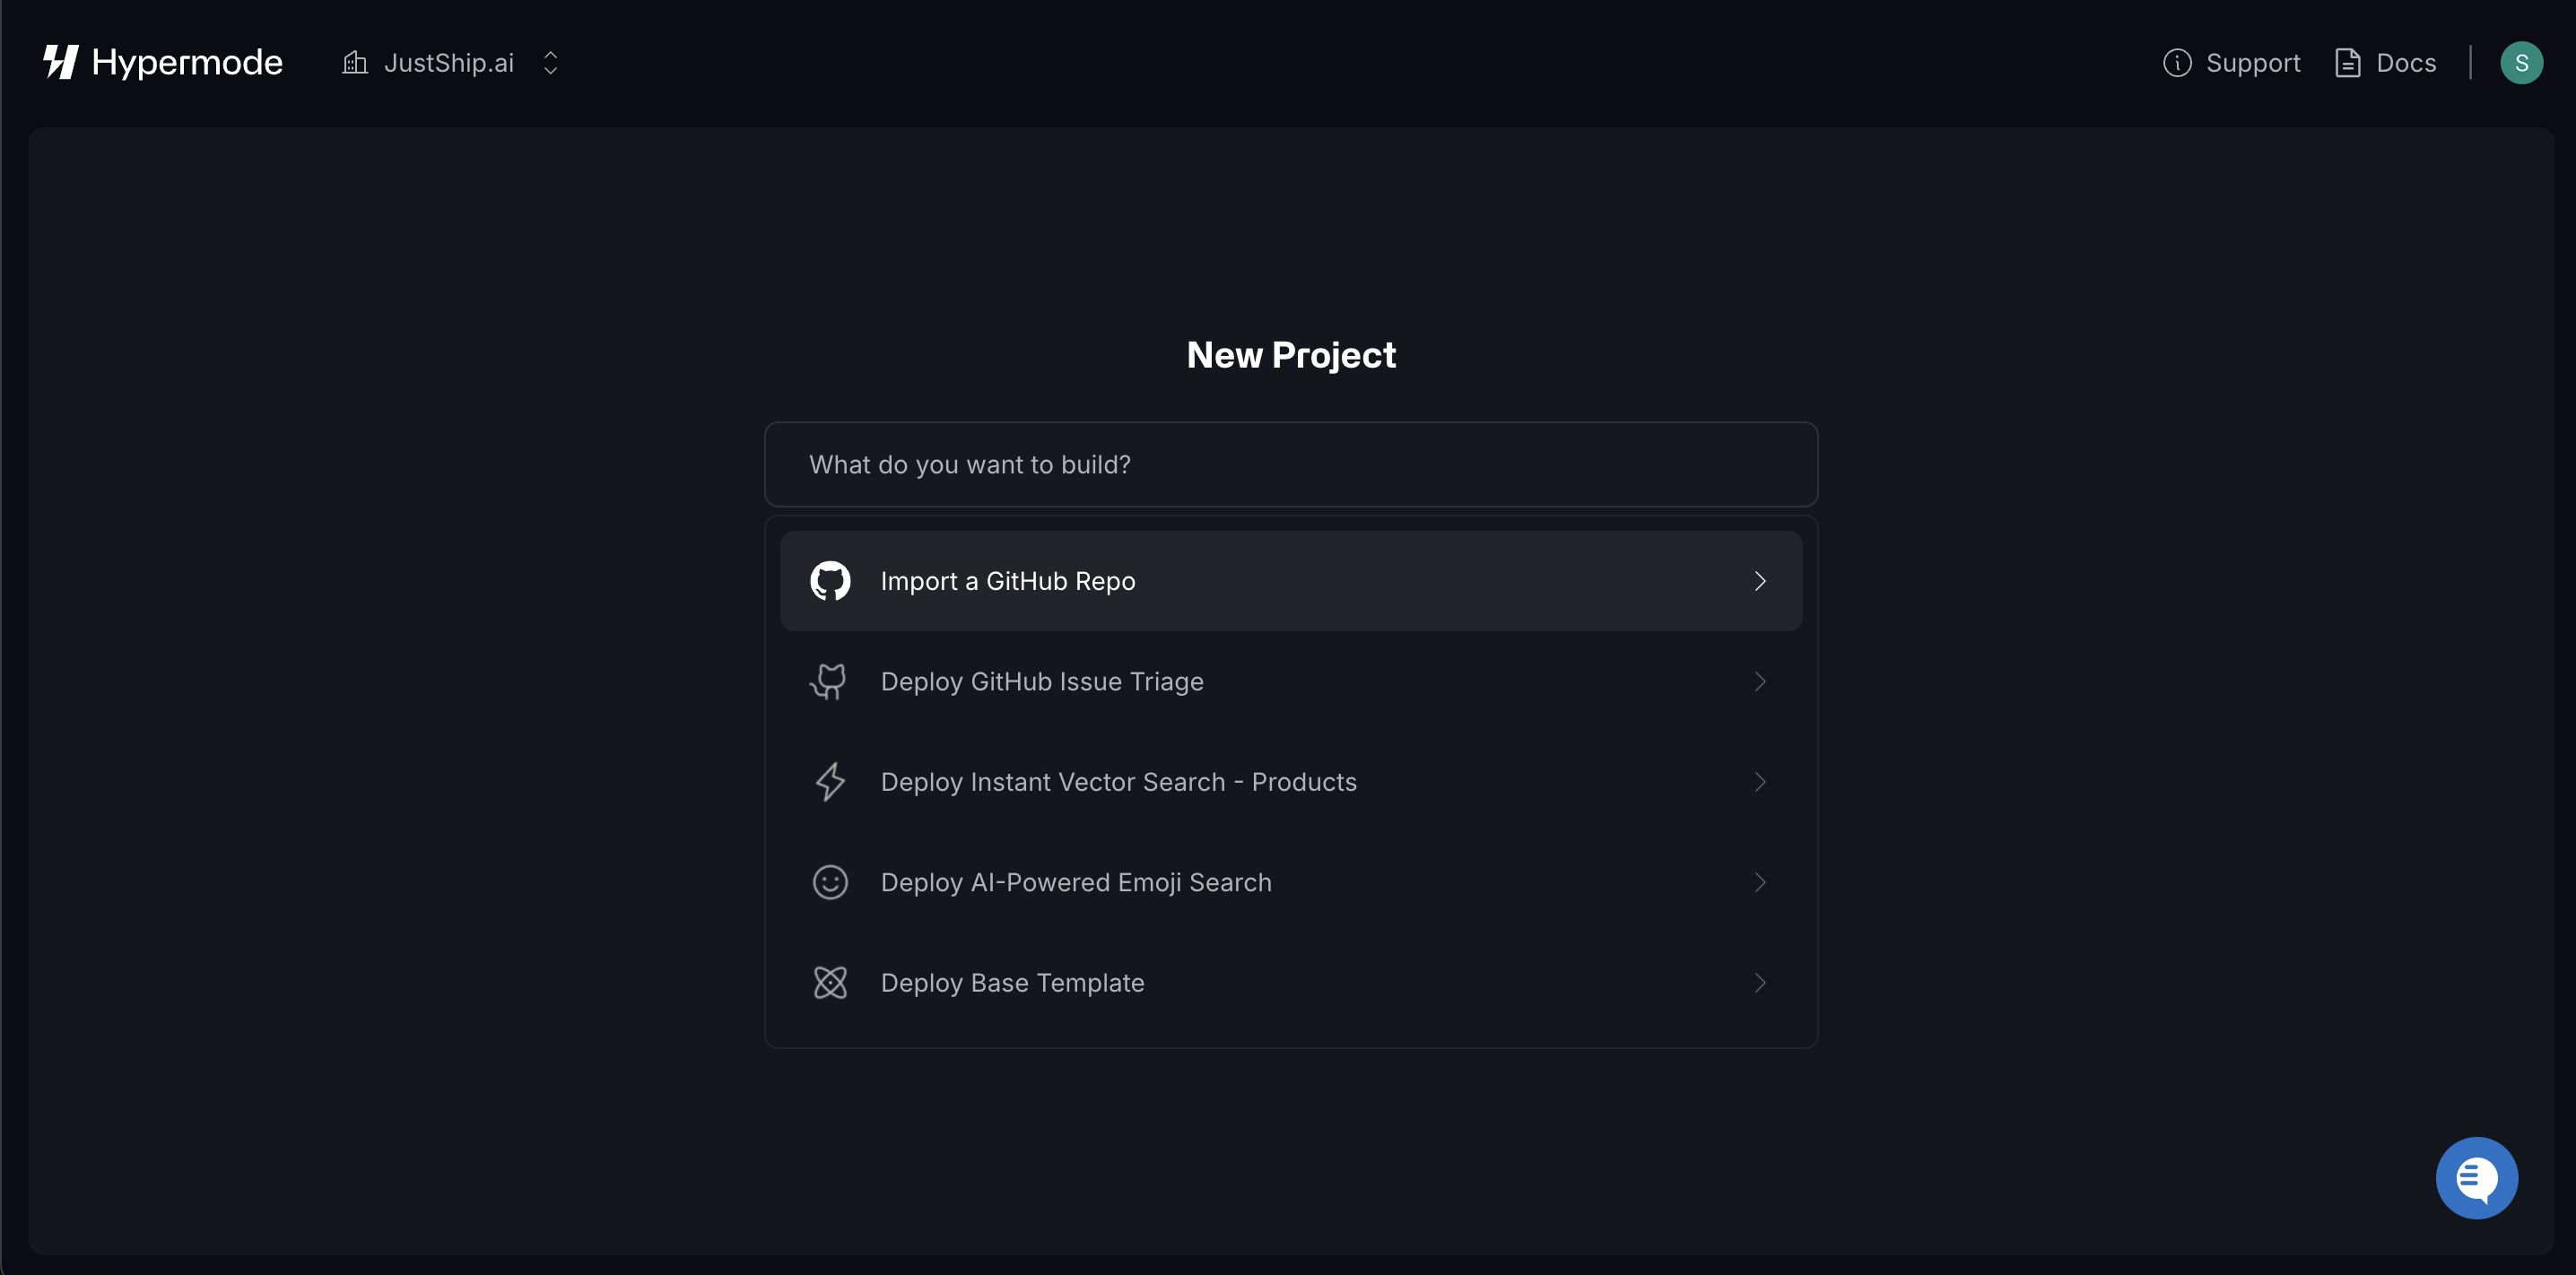
-
Choose the repo you just created.
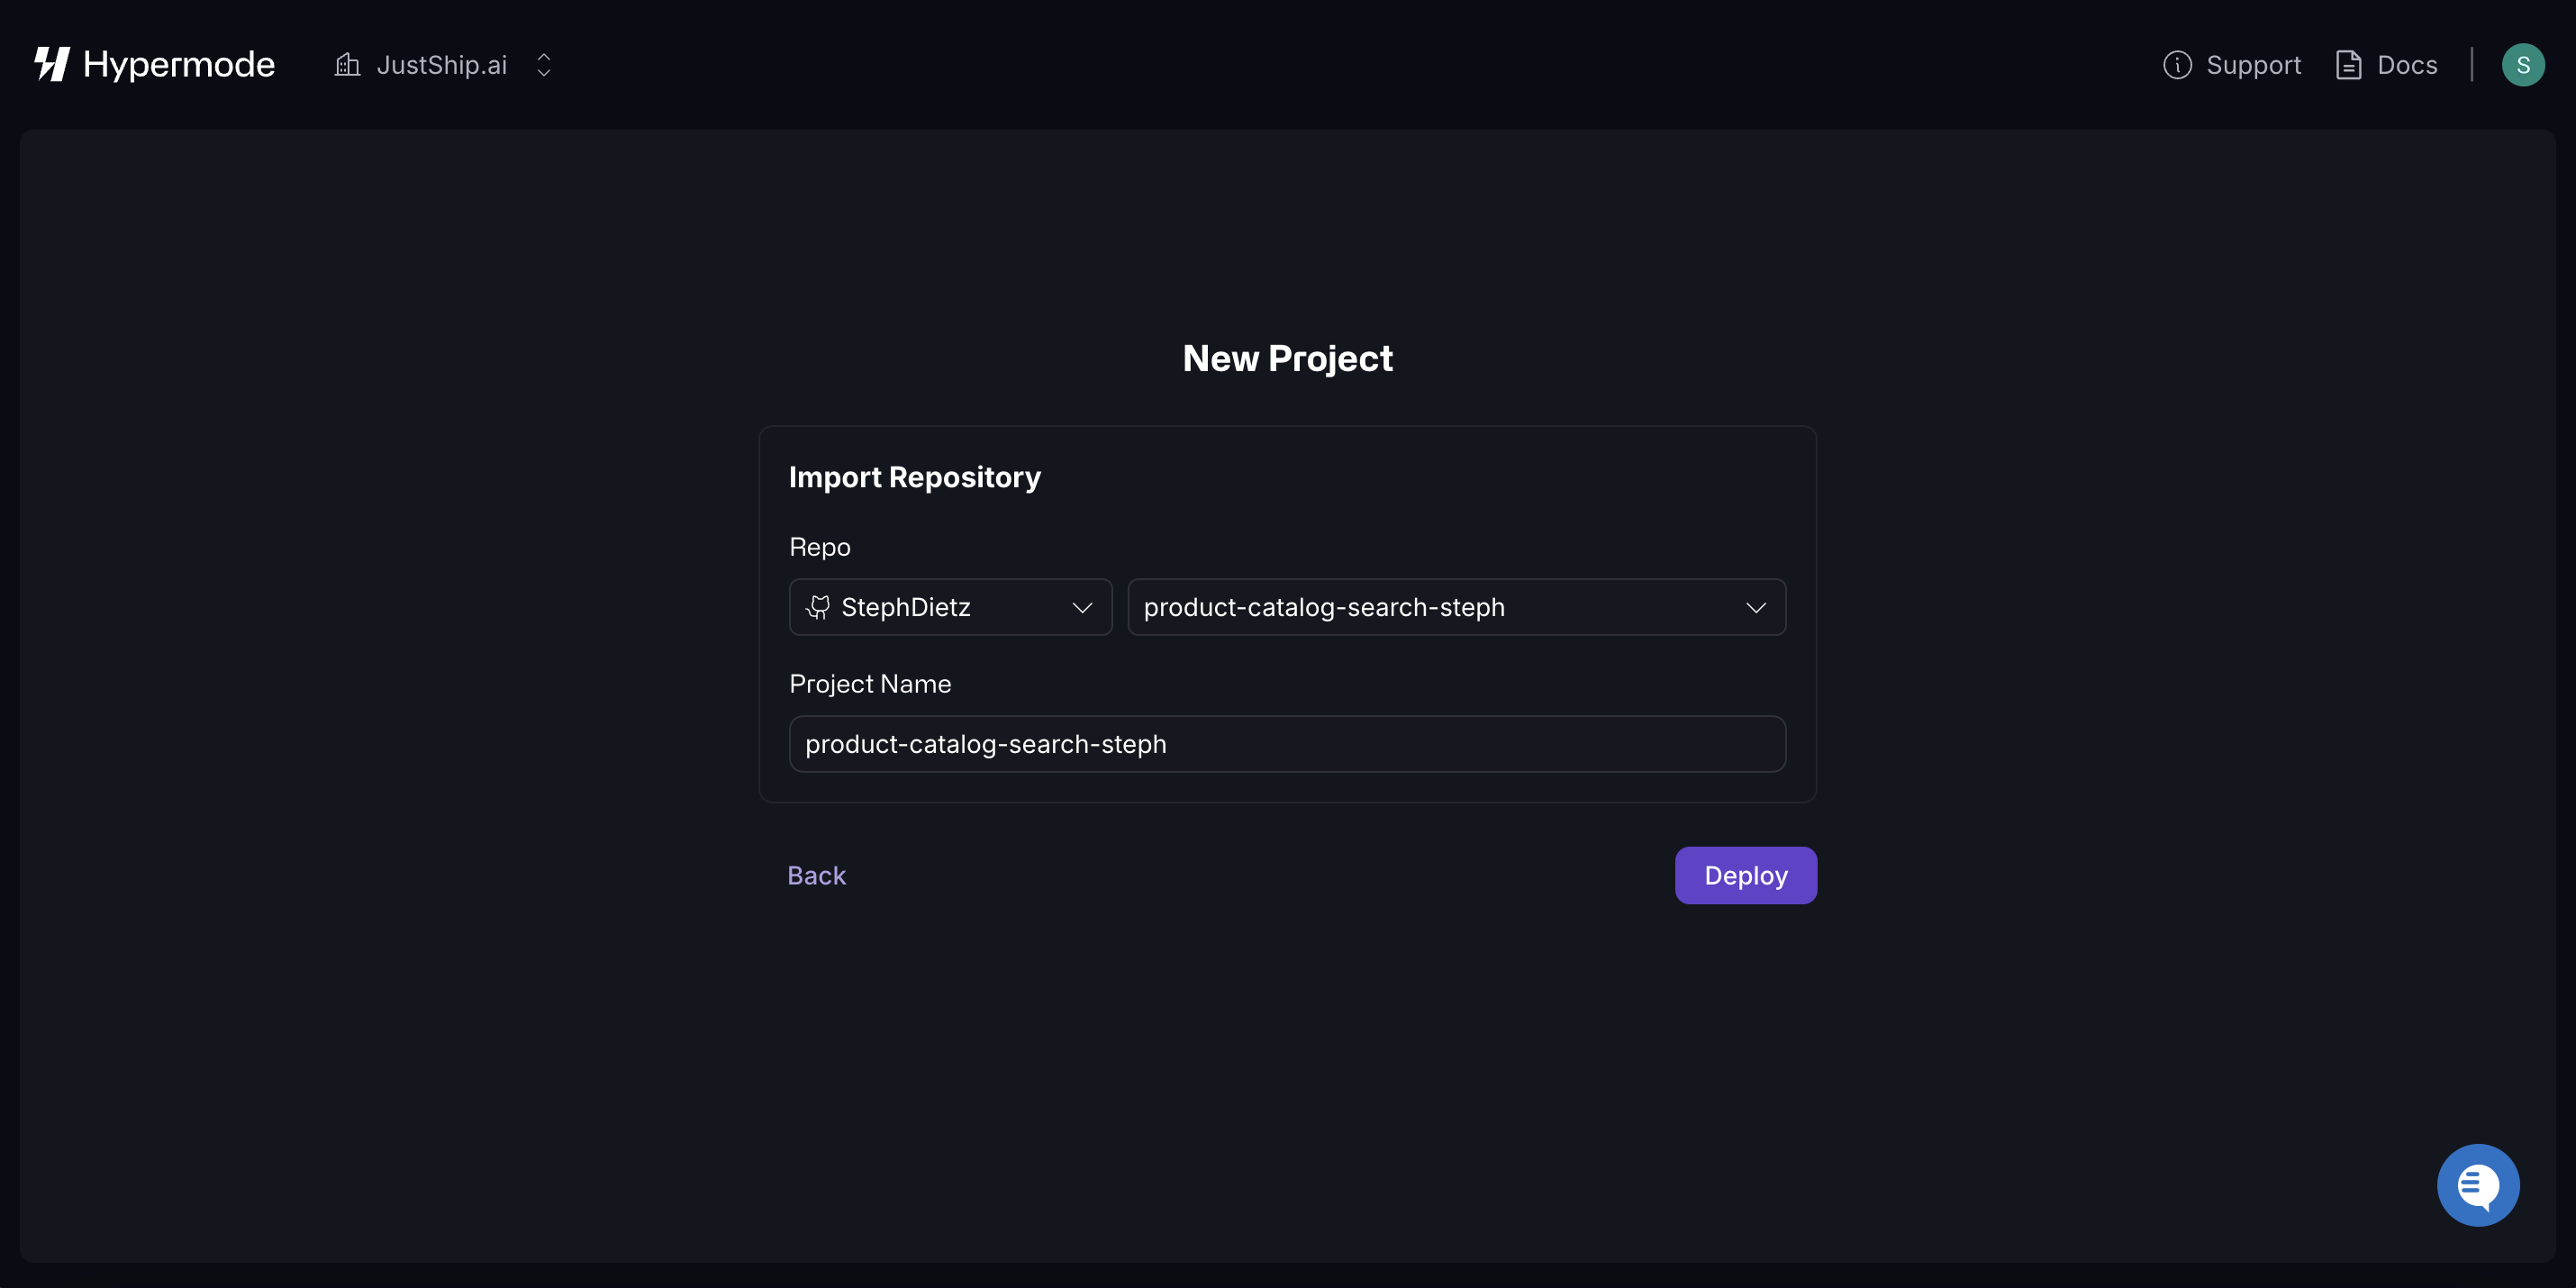
- Click “Deploy” to finish creating your project.
- Once deployed, your functions and collections are visible in the Hypermode console.
Step 2: Seeding your data
- Make your first commit to the repo to trigger a deployment.
-
Ensure you have Python installed on your
machine. You can verify this by running
python --versionorpython3 --versionin your terminal. -
The template includes a script at
/backend/extras/ecommerce_populate.pyto seed your data, as well as sample data located in/backend/extras/hyper_toys.csv. -
If you want to use your own data, replace the content of the sample CSV
(
hyper_toys.csv) with your own data. Make sure the headers in your CSV match the following headers:Uniq Id,Product Name,Category,Selling Price,About Product,Image,Num Stars,In Stock -
Install the required dependencies by running the following command in your
project directory:
-
Edit the
ecommerce_populate.pyfile to include your endpoint and API key, which you can find in your Hypermode dashboard. -
Run the script to seed the data into your project:
- The script batch inserts the data and displays the time taken for each operation. Inserting the full dataset (10,000 rows) may take around 18 minutes. If you want to test with a smaller dataset, feel free to reduce the size of the CSV.
Step 3: Customizing your functions
You can modify the template to suit your needs by customizing the functions in the/backend/functions/assembly directory.
Example: Customizing product rankings
If you’d like to rank products based solely on their star rating, without considering whether they’re in stock, follow these steps:- Go to the
search.tsfile and locate thereRankAndFilterSearchResultObjectsfunction. - Modify the function to only rank based on the star rating, like this:
Deploying the change
- Once you’ve updated the function, commit the changes to your repo.
- Any commit to the
mainbranch automatically triggers a Hypermode deployment. - After deployment, when you query the
searchProductsendpoint again, it ranks products solely based on their star rating.
Step 4: Testing your functions
Once you’ve made changes to your backend functions and deployed them to Hypermode, it’s time to test the updates.Test in the console IDE
In the Hypermode console, navigate to the Query tab to test your modified functions directly. Run queries similar to the ones you used earlier to see how the changes impact the results.Run the frontend locally
The repo you cloned includes a frontend. Move into the frontend directory and add the following values to your.env.local file:
Note: Both of these values are available in the Hypermode consoleNext, just run the command
npm run dev in your terminal to run the app
locally. Now you can test the changes you made to your backend functions.