We’re overhauling Dgraph’s docs to make them clearer and more approachable. If
you notice any issues during this transition or have suggestions, please
let us know.
GraphQL Code Generator
The Apollo Client libraries give you generic React hooks to contact GraphQL backends, but GraphQL Code Generator takes that to the next level by using GraphQL introspection to generate types with hooks specific to the API you are using. That means all your GraphQL calls are typed and if anything ever changes, you’ll know at development time. Firstly, add all the GraphQL Code Generator dependencies as development dependencies to the project with:codegen.yml, in the top-level project directory. The following is the
configuration needed for this project. Remember to replace
<<Dgraph Cloud-GraphQL-URL>> with the URL or your Dgraph Cloud endpoint.
typescript plugin and place the generated code
near-operation-file (we’ll see what that means just below).
Then, add "generate-types": "graphql-codegen --config codegen.yml" to the
scripts key in package.json, so it now looks like:
GraphQL operations
You can layout the source of a Dgraph Cloud project however you wish. For this tutorial you’ll use the following project structure.operations.graphql file.
Then, run GraphQL Code Generator and it generates the src/types/graphql.ts
file with global types for the things that make sense globally and
src/components/types/operations.ts for things that are local to the
components.
Having operations.graphql file in the directory for the components that it
applies to makes it really easy to find the GraphQL (rather than it being split
as strings in a number of javascript files) while still making it clear what
components the GraphQL applies to. If your project gets larger, you might end up
with more project structure and more operations files, but the general process
still works.
Start by creating the scr/components/operations.graphql file and add a query
to find the data for home page’s list of posts.
src/types/graphql.ts and
src/components/types/operations.ts files. If your interested in what was
generated, open up those files and you’ll see how much the code generator did.
If you want to use that to build a UI, read on.
GraphQL React hooks
Of the things that GraphQL Code Generator built after introspecting your GraphQL endpoint, it’s the React hooks you’ll use most in building a UI. From theallPosts query in the operations.graphql file, GraphQL Code
Generator built a hook useAllPostsQuery with everything you need to make that
GraphQL query.
In general, you’ll use it like this
data result will have exactly the same structure as the allPosts
operation, and it’s typed, so you can layout with confidence by for example
using map on the post list returned by queryPost and then indexing into each
post.
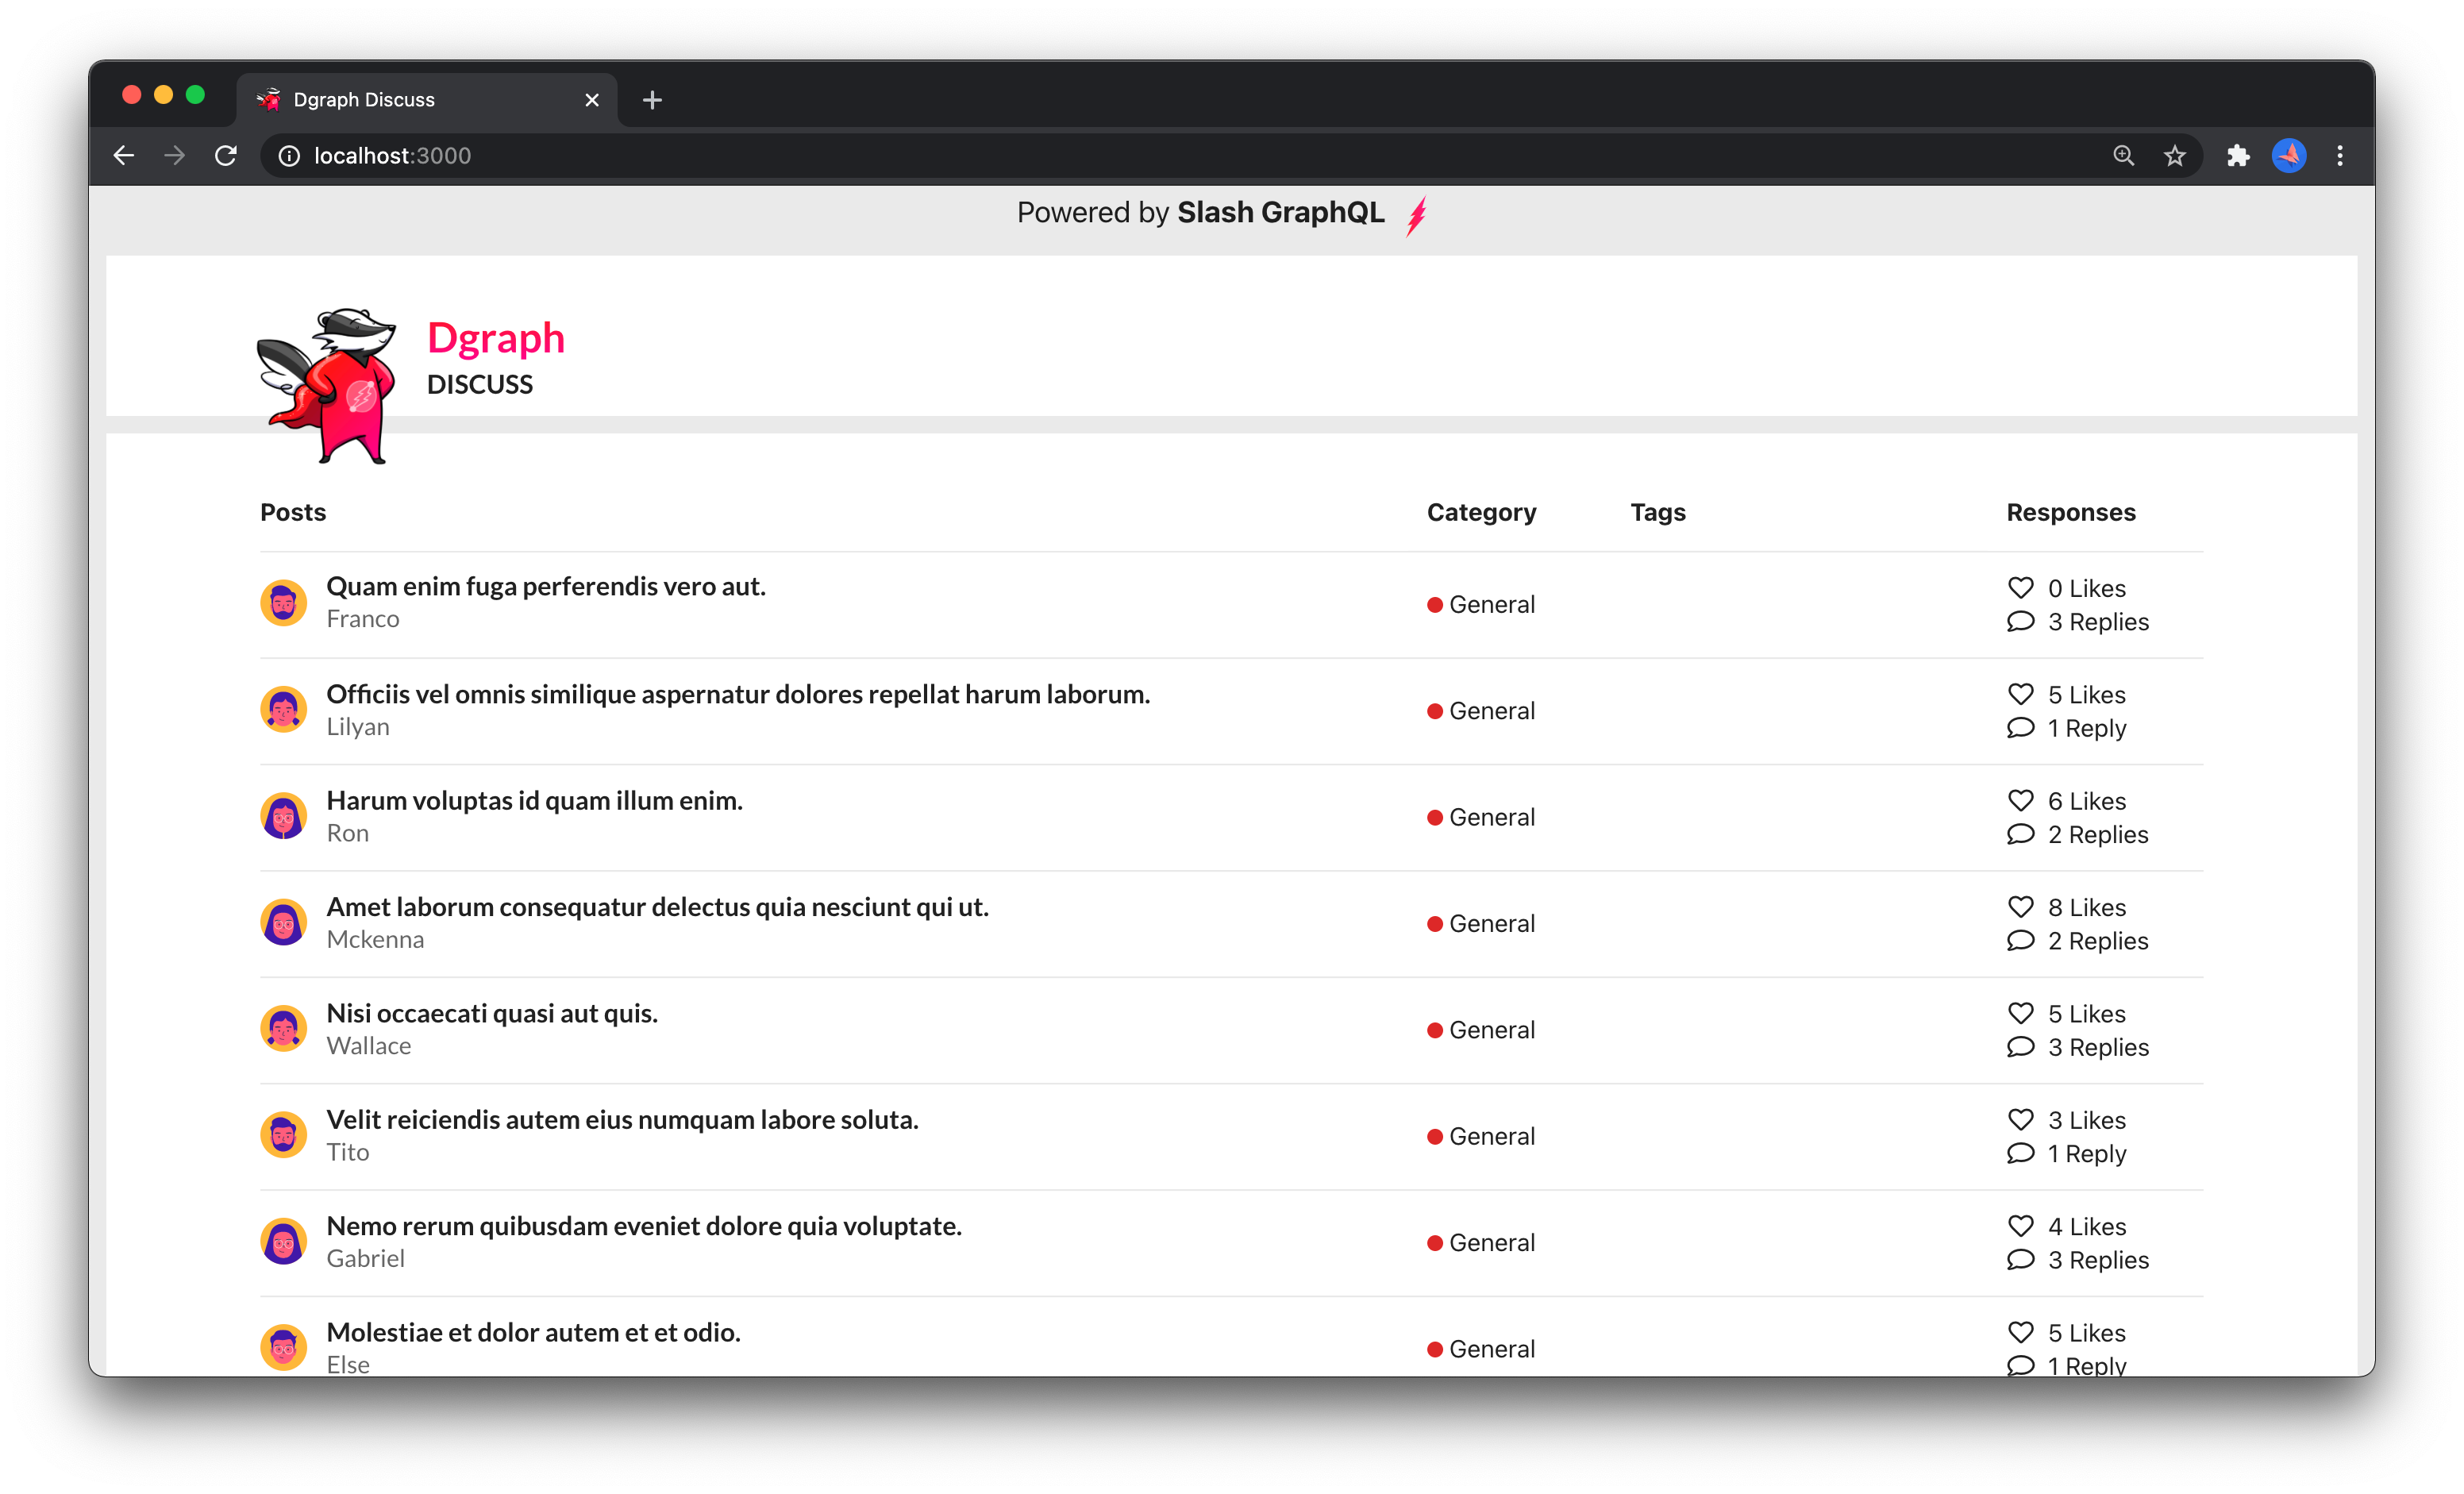
Layout with GraphQL - post list
Now that you have GraphQL to help write queries and get data and GraphQL Code Generator to turn that into typed Javascript, you can now layout your data and be sure you won’t make a mistake because GraphQL and types will catch you. Let’s make aPostFeed component that uses the useAllPostsQuery and renders
the data into a Semantic React UI Table.
post?.title, post?.author.displayName,
etc. Note that the title of the post is made into a link with the following:
src/components/avatar.ts and fill it with this function that uses
random avatars we’ve supplied with the app boilerplate, as follows:
src/components/home.tsx component to render the post list, as
follows:
yarn start if you haven’t already) with a post list of the sample data you
have added to your Dgraph Cloud database.
/post/0x... for the id of the
post. At the moment, those like won’t work because there’s not component to
render the post. Let’s add that component now.
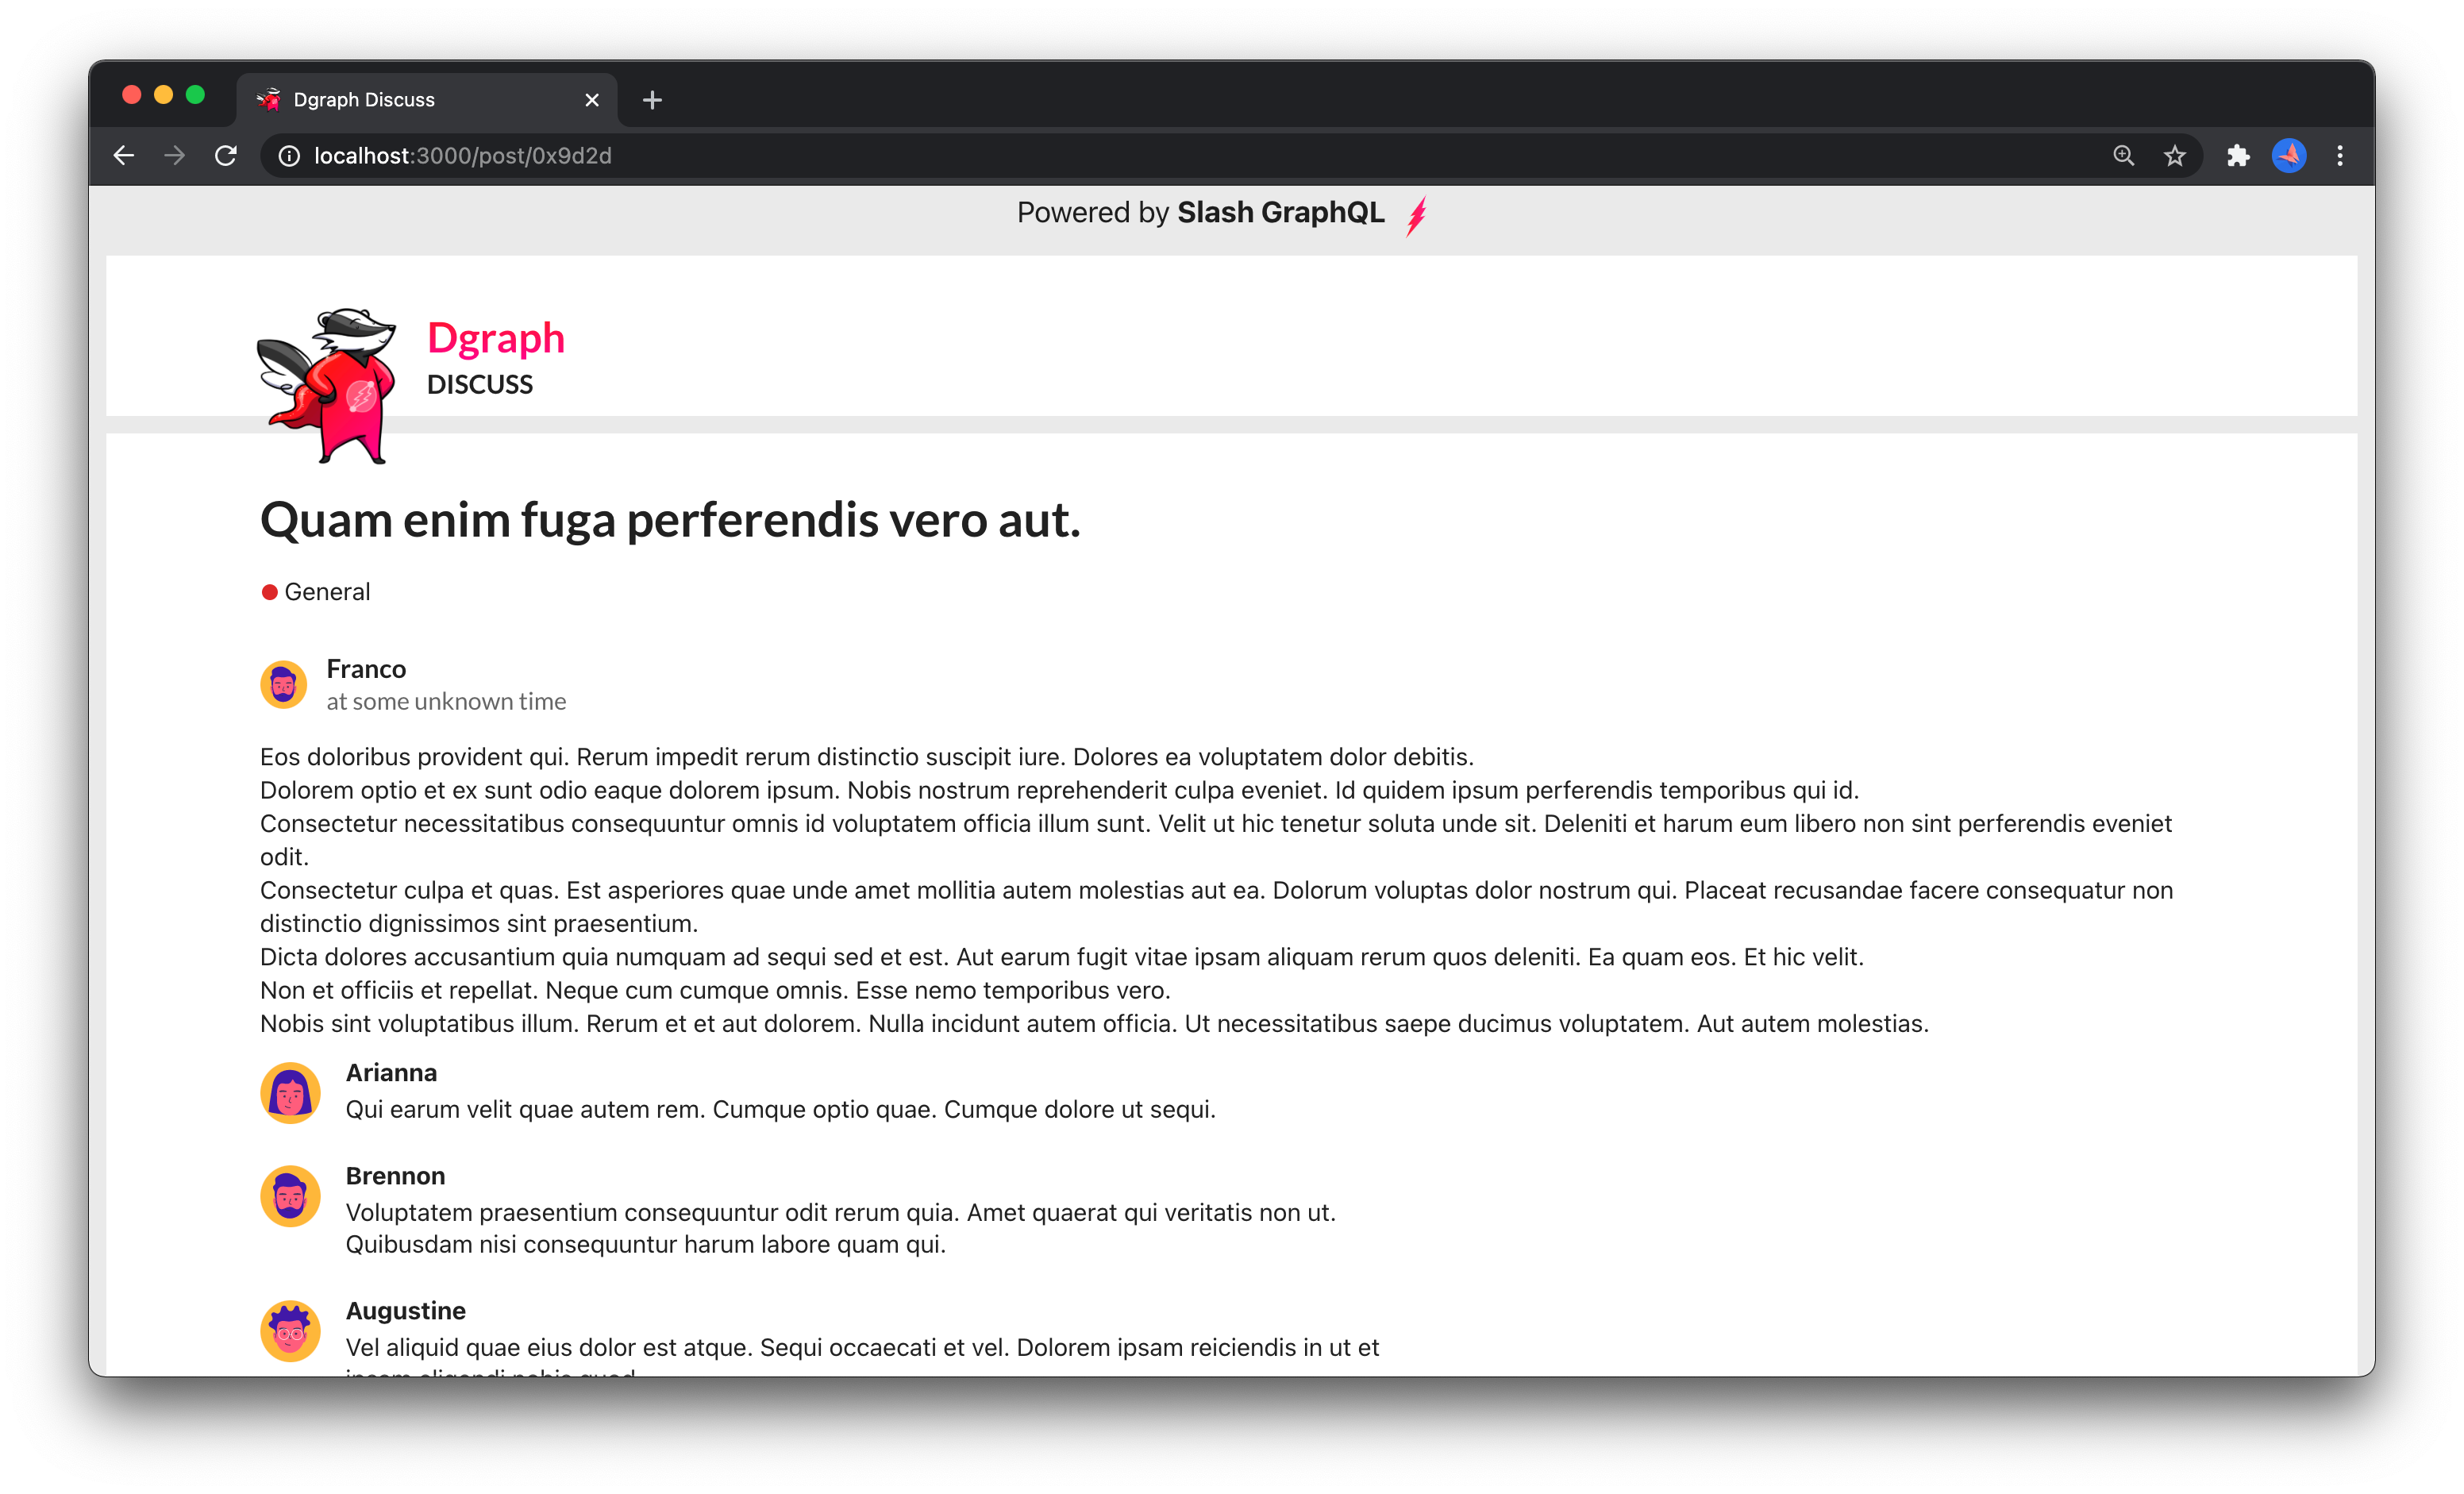
Layout of a post with GraphQL
Adding a new component that relies on different data is a matter of adding the right query tosrc/components/operations.graphql, regenerating with GraphQL
Code Generator, and then using the generated hook to layout a component.
Add a GraphQL query that gets a particular post by it’s id to
src/components/operations.graphql with this GraphQL query.
useGetPostQuery hook in a component. The
difference with the previous hook is that useGetPostQuery relies on a variable
id to query for a particular post. You’ll use React router’s useParams to
get the id passed to the route and then pass that to useGetPostQuery like
this:
data from the hook
to layout an interesting UI. Edit the src/components/post.tsx component, so it
lays out the post’s data like this:
This Step in GitHub
This step is also available in the tutorial GitHub repo with the graphql-queries tag and is this code diff. If you have the app running (yarn start) you can navigate to
http://localhost:3000 to see the post list on the home screen and click on a
post’s title to navigate to the post’s page. In the diff, we’ve added a little
extra, like the Diggy logo, that’s also a link to navigate you home.
Now on to the mutations!